
Published on August 2, 2024 3:35 AM GMT
Epistemic status:
- A response to https://www.lesswrong.com/posts/eBo5YCHP5H58Y5Qjx/whiteboard-pen-magazines-are-useful .A recipe for the creation of an Artifact and a description of undocumented issues that arose.An attempt to extend existing niche technology yet further.
This post was written thanks to funding from the ML Alignment & Theory Scholars Program, but it is a pleasant and helpful diversion rather than the main thrust of my work, which will be in forthcoming posts - you'll be able to tell how much use I got out of it from the pictures in those posts. I crafted the described tool as a helpful defrictioning aid to my research during the main phase of the Summer 2024 cohort, and partially due to that funding, I chose to write up a post here describing it for others to make. By the time you read this, I will likely have left at least one such Artifact at Lighthaven, and I welcome you to make fullest use of it; may it help you catch the math you're chasing. Just remember to leave it where you found it and to replenish the markers!
tl;dr
If you spend meaningful time working at a whiteboard, and you find the use of color in information representation valuable, then some kind of whiteboard magazine is a valuable tool for cutting down on masses of trivial inconveniences, and will likely improve your experiences both writing on whiteboards in various colors and also in reading what you wrote later on. Gods, do I wish I'd been agentic enough to make one of these when I was still a calculus TA. Additionally, I describe an improved standard for a simple and low-cost augmentation to Johannes's standard resulting in massively improved usability.
Procedure
It's seriously not that hard and will take you at most 15 minutes from start to finish. I describe the construction process here in exacting detail for posterity, but realistically you can do a lot of things by eye if you're alright with the possibility of some errors to correct, or of minor defects - especially cosmetic ones - in the final product.
Ensure that you have on hand:
- Duct tape and a suitable cutting implementAt least two whiteboard markers, as components
- Ideally EXPO brand; this procedure is best suited to people in the US.Number and color specifications are listed below.
Start by putting all the markers with their caps on in a line, horizontally on a hard level surface. The markers should be in the order you want them to be in in the finished scribing artifact, and should be vertically justified - make sure the caps line up. They should be equally spaced horizontally, and as close to each other without touching as you can get them to be.
Next, measure out a strip of duct tape greater in length than the width of the line of markers you've made by about 150mm (6"). Cut this strip, and apply the adhesive side to your line of markers such that the line is centered horizontally in your strip of tape, and the bottom of the strip of tape is affixed to all of the caps of the markers, covering one side as fully as possible, without sticking at all to the bodies of the markers themselves. If at this point your tape is stuck to the markers, I recommend peeling the tape back slightly and folding it over, or scrunching it along the marker's surface.
As an alternative to this step, if you're confident in your ability to get the spacing and justification correct enough that fixing mistakes by rolling the marker along or carefully peeling it off will be straightforward, you can also directly apply the markers to the strip of duct tape, which should in this method be on the rigid surface with adhesive side up. As above, the spacing of the markers here is important, and will determine the shape and rigidity of the final product.
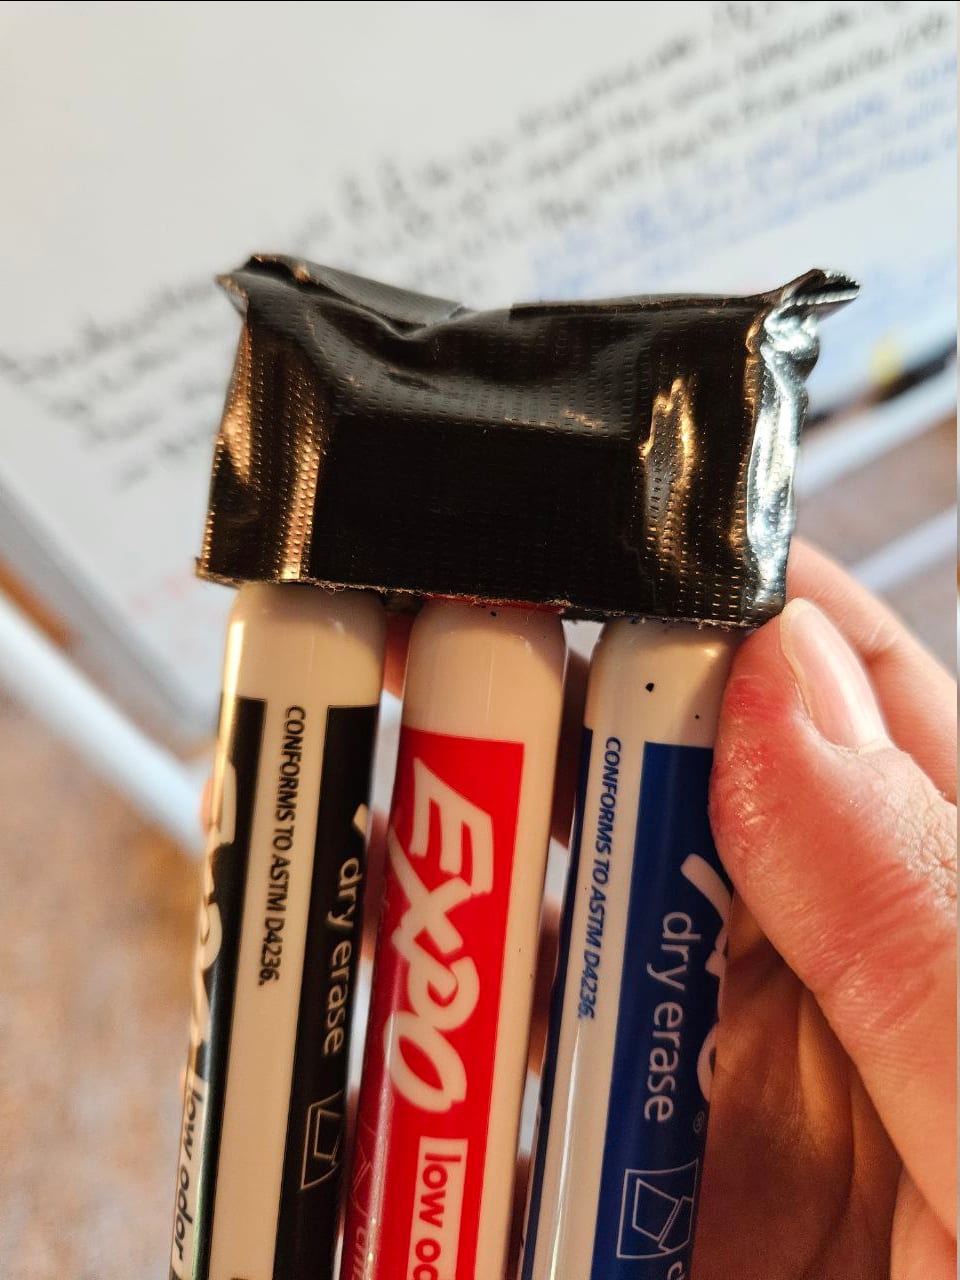
In either case, you should now have several markers, evenly and tightly spaced, horizontally centered, vertically justified, on top of a piece of duct tape with significant overhang. First, fold in the two "wings" of horizontally excess duct tape to secure the two outer markers. Next, fold the vertically overhanging duct tape over top of the caps, keeping the fold as tight and straight as possible. Adhere the tape to the side of the caps not yet covered in tape. Finally, fold over the roughly triangular flaps of tape to stick them to the duct tape on top of the caps.
Care should be taken at this step - unlike Johannes's markers, EXPO markers have caps that aren't cylindrical, and thus even with maximally tightly stacked markers, this procedure will result in a nonrigid magazine not as suitable for use as an ideal application of the FUUU-754 standard.
Thus, at this point, you apply the magnet, which provides structural rigidity on top of added utility. Make sure it's centered horizontally and positioned appropriately vertically - the vertical alignment makes much less of a difference. The magnet should be positioned to lay flat on top of the duct tape on the caps, with the largest-area side contacting the smooth side of the tape you already applied, and the side you apply the magnet to should be the one where if the taped caps are closer to you than the bottoms of the pens, the first/top pen should be on your right, so that when you flip the whole assembly over, the magnet is on the bottom and the first pen is on your left.
Don't do that, though - instead, measure and cut another piece of duct tape somewhat smaller than the first. This goes over top of the magnet to affix it to the duct-taped pen caps. As before, fold back and smooth everything down as best you can.
You should now have a very basic Lesser Scribing Artifact which conforms to the LORX-512 Standard below! From here, how you continue to modify and augment the Artifact is up to you.
The LORX-512 Standard
As in Johannes's post, I SHALL conform to RFC2119 in my use of the protected terms "MUST", "MUST NOT", "REQUIRED", "SHALL", "SHALL NOT", "SHOULD", "SHOULD NOT", "RECOMMENDED", "MAY", and "OPTIONAL".
In order for a whiteboard marker magazine (for brevity, an Artifact) to conform to the LORX-512 standard for whiteboard marker magazines:
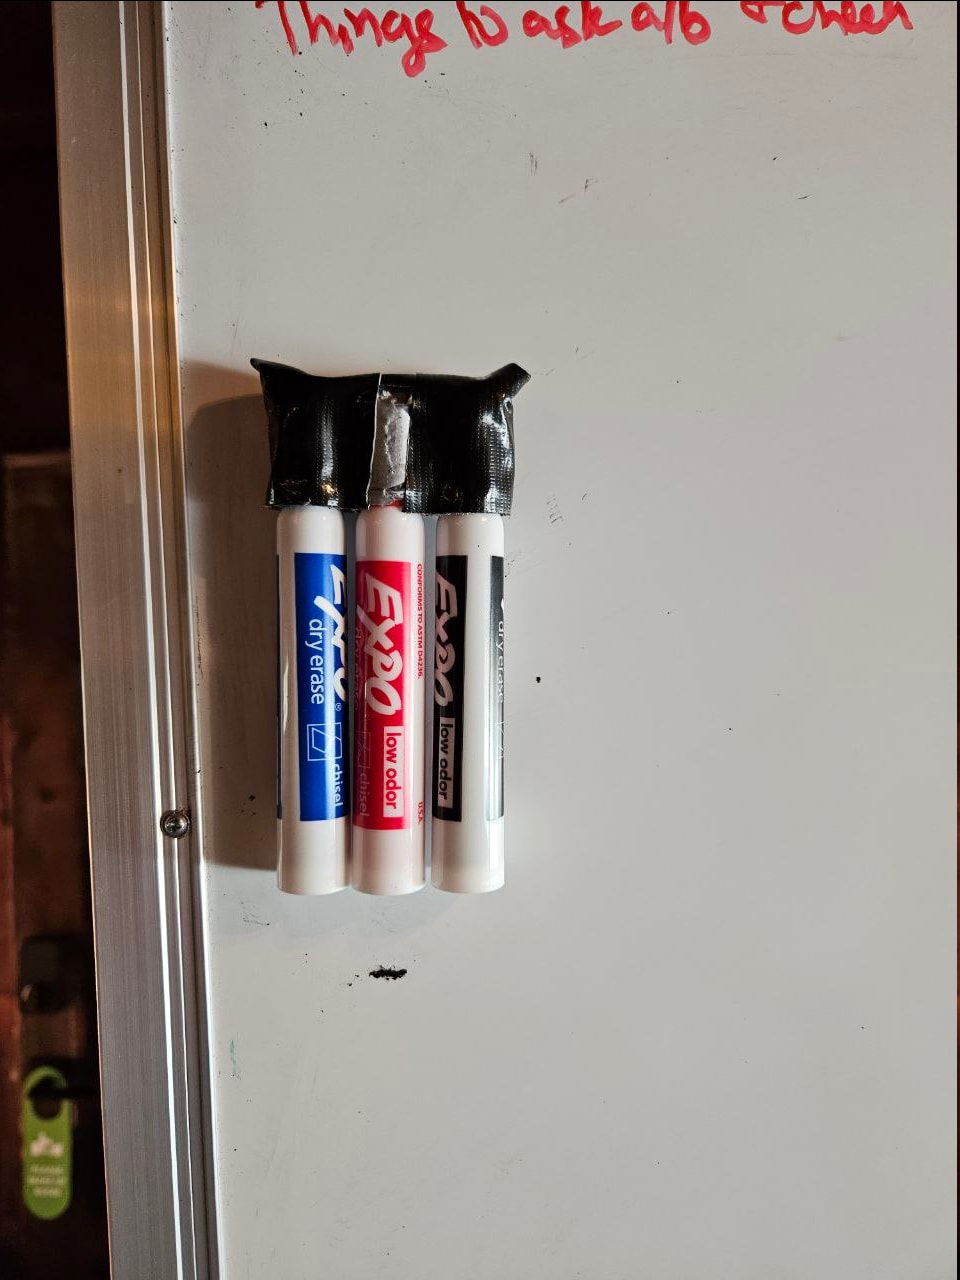
- The Artifact MUST consist primarily of vertically stacked whiteboard markers, like shown in the picture below.The Artifact MUST contain a neodymium magnet under the outermost layer of tape. This is the major difference between the LORX-512 and FUUU-754 Standards.
- The magnet SHOULD be a rough rectangular prism, and MUST have dimensions such that the largest face's short side is 10~20mm and its long side is 30~50mm; the use of a 30mmx10mm magnet as linked is RECOMMENDED. This magnet MUST be centered horizontally and oriented such that a largest-area face is presented for magnetic contact with magnetizable surfaces. The magnet MUST be sufficiently powerful to hold the Artifact securely against reasonable magnetizable surfaces, like whiteboards, refrigerators, and metal chairs, and MUST NOT slide or require special effort to affix to a reasonable surface.The duct tape and magnet MUST be chosen to be of appropriate strength and quality to avoid damaging clothing with magnetic clasps. They SHOULD be chosen to ensure easy attachment to, and detachment from, magnetic clasps in clothing.
- There MUST NOT be two or more pens of the same color. There MUST NOT be more than five pens. There SHOULD NOT be five pens. There MAY be four pens. Three pens is RECOMMENDED. It MUST have at least two pens.The Artifact MUST have at least two of the following three colored pens: Black, Red, and Blue. One of the pens SHOULD be Red.The use of at most three pens is RECOMMENDED. If three pens are to be used, the recommended color-set is {Black, Red, Blue}. If four pens are to be used, Green is the RECOMMENDED color for the additional pen.
- The use of an orienting mark is OPTIONAL. By convention, the side with the magnet is the bottom side, and the side with the Black marker is the left side, if there is a Black marker; the Artifact SHOULD be held by the cap end.Holding the Artifact bottom-side down/away and by the cap end, from top to bottom the ordering of marker colors SHOULD respect the ordering [Black < Red < Blue < Green < other]. Ordering of colors outside {Black, Red, Blue} MAY be done to taste, though there SHOULD be some clear system or logic to the ordering, and the use of HSV order, starting just after Red, is RECOMMENDED.
Discuss
