
When the situation requires to translate both - source and destination addresses in incoming packets , it may be not obvious how to do so. In this article I will show how to do it in either usual NAT or Central NAT modes.
Translate source IP address (SNAT) and Destination IP (DNAT) in usual, non-Central NAT mode
Configuration
This is how it is being done in most of the deployments.
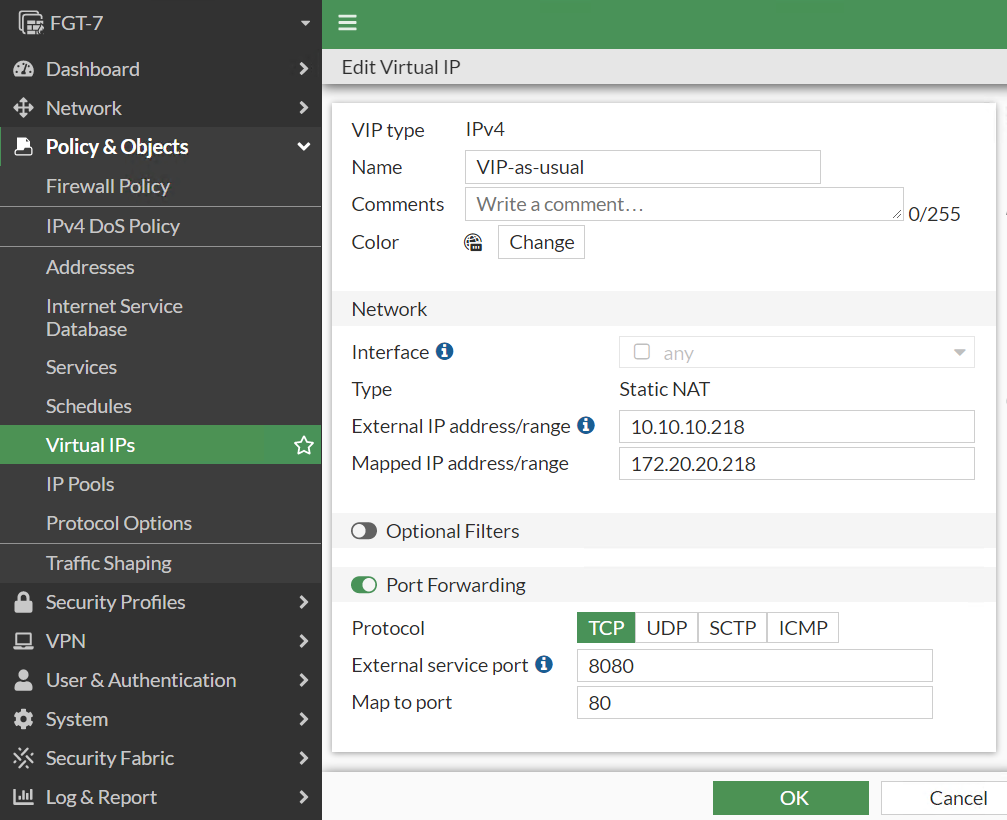
Configure VIP as usual, translating the destination IP address from external to internal one.
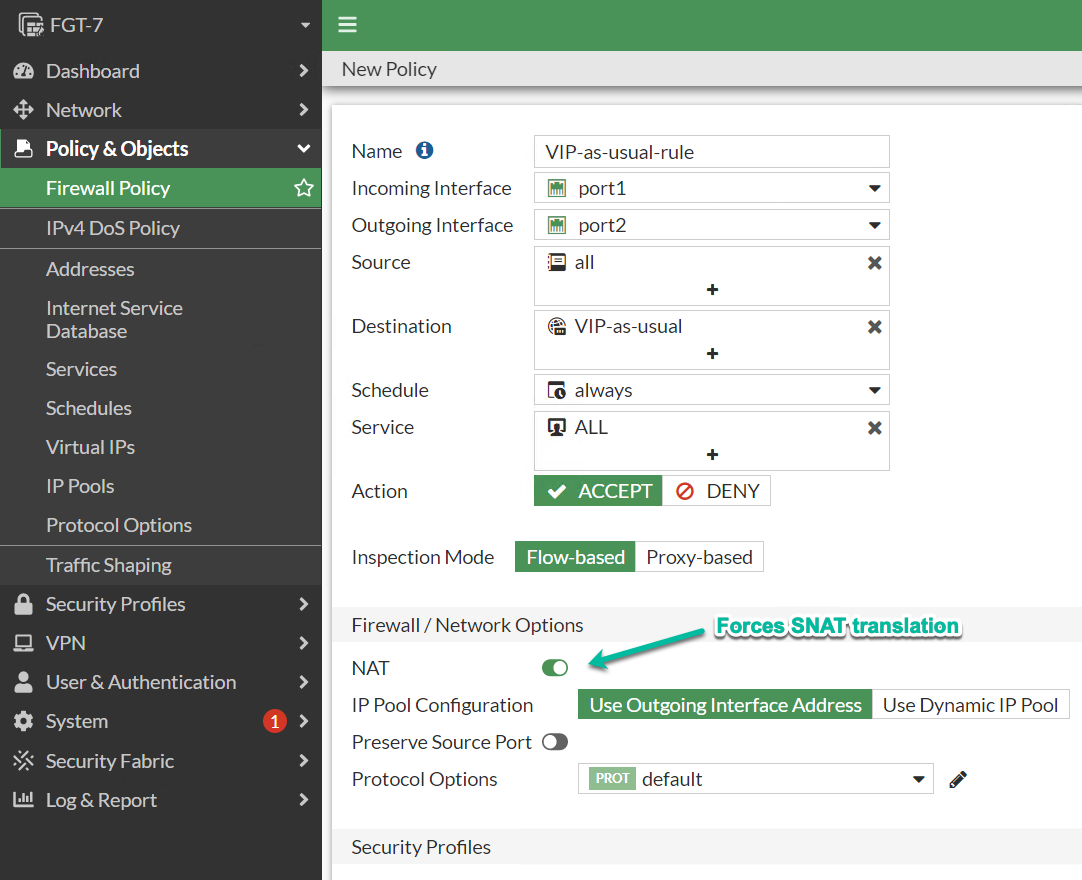
In security rule using the VIP object, enable NAT and set either outgoing interface or IP Pool as the source IP address.
In the following examples I want to make accessible internal server with IP of 172.20.20.218 and port 80 via external IP of 10.10.10.218 and port 8080. Additionally, I want clients connecting to the server to come from the source of 172.20.20.254 of the Fortigate internal (port2) interface.
Verification:
FGT-7 # diagnose sniffer packet any ' port 8080 or net 172.20.20.0/24' 4Using Original Sniffing Modeinterfaces=[any]filters=[ port 8080 or net 172.20.20.0/24]4.579674 port1 in 172.14.14.1.56352 -> 10.10.10.218.8080: syn 1639243840 (1)4.579752 port2 out 172.20.20.254.56352 -> 172.20.20.218.80: syn 1639243840 (2)
First packet from client 172.14.14.1 arrives to external interface destined to 10.10.10.218 port 8080
Packet’s source and destination are translated: source from 172.14.14.1 to 172.20.20.254 (internal port2 IP on the Fortigate) and destination from 10.10.10.218 to 172.20.20.218 (Internal server IP)
Translate Source and Destination IP addresses when the Central NAT is enabled
The functionality does not change with switching to the Central NAT, but NAT, security rules, and VIP configurations are done in separate sections and do not depend on each other.
The workflow is:
Create VIP object in Policy & Objects → DNAT & Virtual IP as usual.
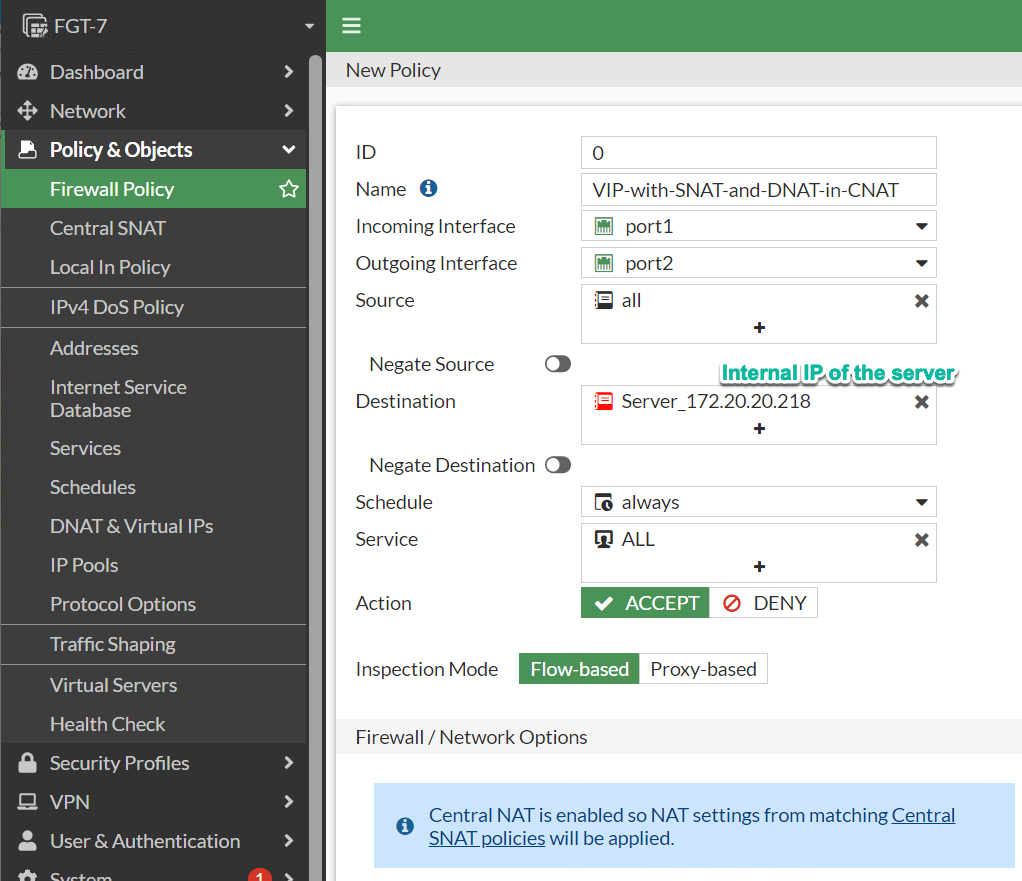
Create the security rule allowing access to the TRANSLATED destination IP, i.e. internal IP used in VIP configuration.
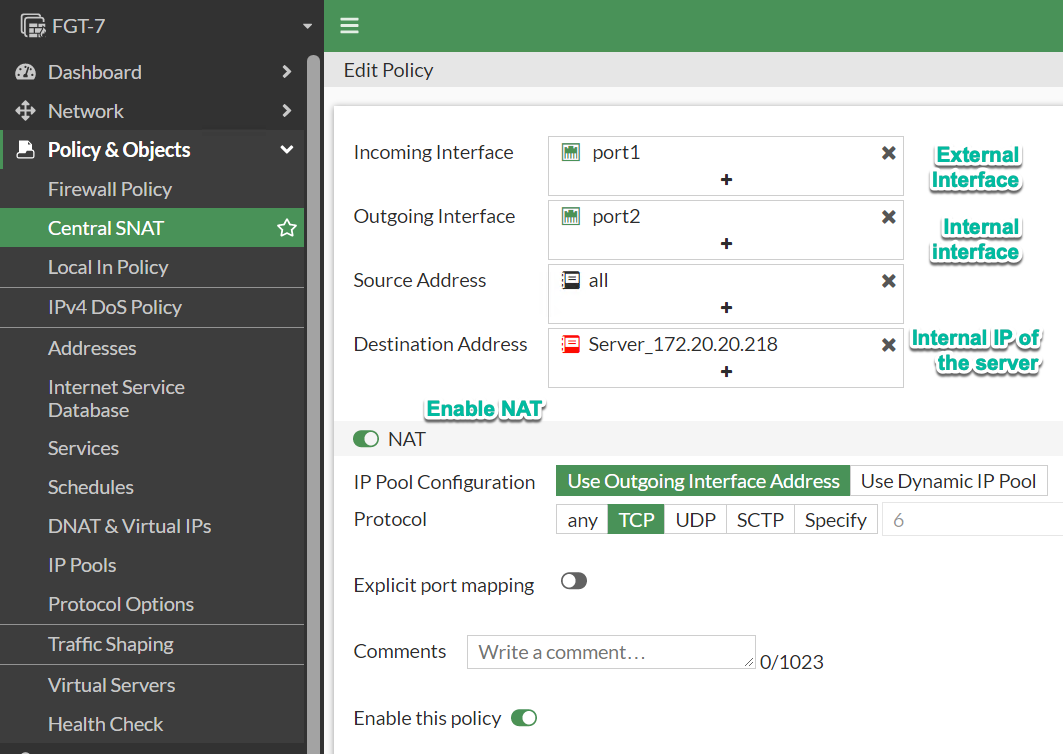
Create the following rule in Policy & Objects → Central NAT policy:
Direction: External to Internal interface
Src IP: All or as needed, represents external clients connecting to the internal hosts, used for matching only, not for translating.
Dst IP: Internal IP address of the internal host, i.e. IP after DNAT translation.
Translation: Here we set to what IP address we want Source IP of the external client to be translated - pick either outgoing interface or IP Pool.
Configuration
Verification
FGT-7 # diagnose sniffer packet any ' port 8080 or host 172.20.20.218' 4Using Original Sniffing Modeinterfaces=[any]filters=[ port 8080 or host 172.20.20.218]6.396542 port1 in 172.14.14.1.58630 -> 10.10.10.218.8080: syn 13963313296.396611 port2 out 172.20.20.254.58630 -> 172.20.20.218.80: syn 1396331329
CLI configuration
FGT-7 # show firewall central-snat-mapconfig firewall central-snat-map edit 1 set uuid 5f691854-bc8f-51eb-bd91-c227379e4792 set srcintf "port1" set dstintf "port2" set orig-addr "all" set dst-addr "Server_172.20.20.218" set protocol 6 nextendFGT-7 # show firewall policyconfig firewall policy edit 1 set name "VIP-with-SNAT-and-DNAT-in-CNAT" set uuid 15ac35d4-bc8f-51eb-ad82-7fc0a73227b3 set srcintf "port1" set dstintf "port2" set srcaddr "all" set dstaddr "Server_172.20.20.218" set action accept set schedule "always" set service "ALL" set logtraffic all nextendFGT-7 # show firewall vipconfig firewall vip edit "VIP-as-usual" set uuid 5eda6046-bc76-51eb-cbe7-ab34fa9b44ff set extip 10.10.10.218 set mappedip "172.20.20.218" set extintf "any" set portforward enable set extport 8080 set mappedport 80 nextend
Related:
Follow me on https://www.linkedin.com/in/yurislobodyanyuk/ not to miss what I publish on Linkedin, Github, blog, and more.
