
- Benefits of using CLIUse get inside any configuration subtree to show currently active settings for this modulegrep - the Secret weapon for searching the configuration and diagnosticsNavigating the CLIUse select, append, unselect to avoid costly mistakesDisable screen paging to get rid of
--More-- in the outputalias for commands saves typing timeNot sure what is the string limitation or what is availabe in any config mode? tree to the rescueSave console output to a fileRun CLI command(s) remotely without interactive login- Find admin users open to the WorldSend multi-line command - get routing table and wan interface state
Benefits of using CLI
Working on Fortigate CLI instead of GUI has lots of advantages, some of them are:
Most of the advance settings in Fortigate are available ONLY in CLI.
The CLI changes very little with new firmware versions, as opposed to GUI where settings/menu get moved around freely. So, once you learn it (CLI), you don’t need to re-learn it with new FortiOS releases.
You can see the context of the configuration by using show, so not to make mistakes.
Full configuration search grep is available only on CLI.
You can jump between different parts of configuration in split seconds, unlike navigating each menu item in GUI.
You can see actual active and complete settings of any Fortigate configuration by using get, which is not possible in GUI.
Diagnostics and debug are done exclusively on CLI.
And now, when you are sold on benefits of using CLI in Fortigate, let me share useful tips on working with CLI I learned over the years.
Use get inside any configuration subtree to show currently active settings for this module
Once you enter any configuration subtree by using config command, you can issue get to see settings for this subtree. For example, going to config sys interface, then edit port1 to enter port1 interface subtree, you can run get and see ALL the settings for this port. It will be at least 3 times more than is shown in GUI.
grep - the Secret weapon for searching the configuration and diagnostics
Fortigate configuration is huge, thousands of lines, no one can remember where every setting is located, nor should. You can search all the configuration with the grep command. For example, say we need to know what HTTPS port was configured for admin access, but we don’t know where it is placed neither how exactly it is named. No problem, just search for admin, like this:
NSE8# show | grep admin#config-version=FG100E-5.6.11-FW-build1700-190814:opmode=1:vdom=0:user=admin set admin-scp enable set admin-sport 4434 <-- HERE IT IS! set admintimeout 300 ...But that is not the whole power of grep - now we want to see the exact configuration location to go and change it. You can use -f for that to show the context of the search term. To continue the example above, let’s find the subtree for the HTTPS GUI admin port:
NSE8# show | grep admin-sport -fconfig system global set admin-scp enable set admin-sport 4434 <--- set admintimeout 300 set alias "FG100E123123" set gui-certificates enable set hostname "NSE8" set proxy-auth-timeout 1 set timezone 36endNow, we can change this GUI management port easily on CLI.
Even more to that, the command show displays only non-default settings, that is, the settings we changed. But grep knows to search even configs not visible neither in GUI, nor in CLI! Just use # show full | grep <config we want to see>.
And of course, you can use grep with ANY output producing command, like diagnose and get, not only show.
grep search is case sensitive by default, but we can add -i option to makeit case insensitive.
Another useful option is -n which will show line numbers of each foundconfiguration line.
Navigating the CLI
We have some basic Linux movements available, which makes editing long commands much faster.
| Command | Description |
|---|---|
Ctrl + C | When inside |
Ctrl + A | Jump to the beginning of the line. |
Ctrl + E | Jump to the end of the line. |
Ctrl + F | Move cursor one word forward. |
Ctrl + B | Move cursor back one word. |
Arrow up/down | Put previous/next command you entered before (command history). |
\ | Use backslash as the last character on a line to continue the command to the next line without applying it. It is sometimes useful when entering long URL/Regex filters to see the whole command uncut. |
Use select, append, unselect to avoid costly mistakes
Using set inside any config subtree replaces any existing values there, which may be not what you meant. Fortigate have other options for us.
To APPEND to the exiting values, leaving them intact, use append instead of set. Let’s see an example. Say we have a firewall address group containing 5 addresses, like this:
config firewall addrgrp edit "TEST_GROUP" set member "TEST2" "TEST1" "TEST3" "TEST4" "TEST5" nextendAnd we want to add another member TEST7 to this list. If we use set member TEST7 this will put TEST7 as the member but will also remove the other members. To actually add to the list, we use append:
(TEST_GROUP) # append member TEST7
After which, the address group will look:
config firewall addrgrp edit "TEST_GROUP" set member "TEST1" "TEST2" "TEST3" "TEST4" "TEST5" "TEST7" nextend
Next is unselect keyword - it deletes from the list members you give it.For example above, let’s delete just members TEST2 and TEST5:
(TEST_GROUP) # unselect member TEST2 TEST4
This will have the effect:
config firewall addrgrp edit "TEST_GROUP" set member "TEST1" "TEST3" "TEST5" "TEST7" nextend
Next in line is unset - when you want to keep the containing object (say address group), but clear it from all of its members. Example is due, let’s remove all members from the address group (this will NOT delete those objects from Fortigate, just from the address group):
(TEST_GROUP) # unset member
The address group will now look like:
config firewall addrgrp edit "TEST_GROUP" set uuid fd3er8e8-8d2a-53ec-93e3-33578fa nextend
Disable screen paging to get rid of --More-- in the output
Output paging is on by default, but if you want to see the full command output, for example when saving console output to a log file, this gets in the way as it peppers each output window with --More--. We can disable this paging:
config system console set output standardendTo bring paging back:
config sys console set output moreendalias for commands saves typing time
Fortigate commands can be and many times are lengthy, how about showing routing table - get router info routing all? Typing such commands over and over again wastes time. The command alias will help us here. Unlike in Cisco world, unfortunately, there are some limitations:
Configured aliases are saved in the configuration and so survive reboots and upgrades.
Aliases are available at the top level only. That is, if we are inside configuration subtree no aliases for us. E.g. we can set/use aliases for commands run at # prompt, but once we enter say interface configuration, no aliases are available.
Commands in aliases are not limited in the depth of subconfiguration tree. It means, while they have to start at the top level, they don’t have to end there. E.g. we can create alias that combines commands like config system interface, edit port1, set status disable in one alias.
Alias can combine multiple commands run in sequence.
Alias can NOT accept arguments. If we have an alias shint for show system interface, we cannot add an interface name to it as an argument when running it - alias shint port1 will report error.
To use alias you specify word alias then name of the alias itself (see below examples).
To configure alias we use config system alias command. Let’s create an alias for displaying routing table.
config system alias edit "rt" set command "get router info routing all" next edit "rt6" set command "get router info6 routing-table" nextendNow, to use the alias:
# alias rtRouting table for VRF=0Codes: K - kernel, C - connected, S - static, R - RIP, B - BGP O - OSPF, IA - OSPF inter area N1 - OSPF NSSA external type 1, N2 - OSPF NSSA external type 2 E1 - OSPF external type 1, E2 - OSPF external type 2 i - IS-IS, L1 - IS-IS level-1, L2 - IS-IS level-2, ia - IS-IS inter area * - candidate defaultS* 0.0.0.0/0 [10/0] via 192.168.13.1, port1C 10.10.17.0/24 is directly connected, port3C 192.168.13.0/24 is directly connected, port1Not sure what is the string limitation or what is availabe in any config mode? tree to the rescue
Every user-defined setting you enter has some limitation, be it on its numerical value range, or string/name length. It disappoints to carefully type a long and descriptive name for a new address or url filter just to get it discarded with the error "The string is too long".
To see limitations of all the settings in the current config subtree, just run tree inside the config mode:
# config sys int(interface) # tree-- [interface] --*name (16) <-- Interface name can be up to 16 characters long <-- * means this is a required setting. |- vdom (32) |- cli-conn-status (0,4294967295) |- fortilink |- mode |- distance (1,255) |- priority (0,4294967295)Save console output to a file
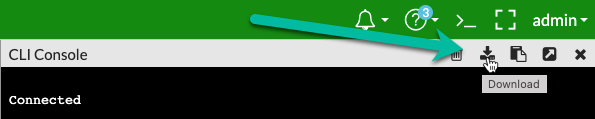
CLI browser applet in the Fortigate has option to save the output (after it was dsiplayed) to a file. Find this in the upper right corner of the GUI. For those cases when you don’t have luxury of fully fledged SSH client.
On any standalone SSH client though, there is always an option to enable logging of the session output to a text file, so use it accordingly, probably disabling the paging as per above.
Run CLI command(s) remotely without interactive login
When you need to run a command (or series of commands) and be off, you can save time by running Fortigate CLI command(s) via ssh tunnel without interactively logging in to the firewall. This is a feature of SSH protocol, not specific to Fortigate. Additionally, by piping the output of CLI command to the local shell we can do powerful post-processing which is not possible on the Fortigate CLI.
Find admin users open to the World
For example, let’s find all the admin local users of the Fortigate where their access is NOT limited by IP address, that is, which are allowed to login from ANY. Bad practice.
When an admin user is set with trusthost equal to 0.0.0.0, it means such user can connect from anywhere, also, in CLI such user has no trusthost in the output of show command. So, we have to search for the lack of set trusthost command in the output of show sys admin. Let’s do so with the Awk:
yurisk@Yuri-Mac-mini% echo -e " show sys admin " |ssh admin@192.168.13.177 | awk 'BEGIN {RS = "edit"} $0 !~ /trusthost/' (1)Pseudo-terminal will not be allocated because stdin is not a terminal.Enter passphrase for key '/Users/yurisk/.ssh/id_rsa':NSE8-lab-FGT200F # config system admin "bad_user" (2) set accprofile "super_admin" set vdom "root" set password ENC SH2JxMvVDR87AhtyTiChIbkk+fEJAWjDtpGA= nextendThis is run on the local host - show sys admin is sent to Fortigate, then output is parsed by Awk to look for users without trusthost set.
This is the user open to the World.
If VDOMs are enabled:
ssh myuser@192.168.13.177 'config globalshow sys admin' | awk 'BEGIN {RS = "edit"} $0 !~ /trusthost/'Send multi-line command - get routing table and wan interface state
We can send multi-line commands to the Fortigate as well. Let’s send in one go 2 commands: get router info routing all and get sys interface | grep wan1:
yurisk@Yuris-Mac-mini% ssh admin@192.168.13.177 'get router info routing allget sys int| grep wan1'Pseudo-terminal will not be allocated because stdin is not a terminal.Enter passphrase for key '/Users/yurisk/.ssh/id_rsa':NSE8-lab-FGT200F # Codes: K - kernel, C - connected, S - static, R - RIP, B - BGP O - OSPF, IA - OSPF inter area N1 - OSPF NSSA external type 1, N2 - OSPF NSSA external type 2 E1 - OSPF external type 1, E2 - OSPF external type 2 i - IS-IS, L1 - IS-IS level-1, L2 - IS-IS level-2, ia - IS-IS inter area * - candidate defaultS* 0.0.0.0/0 [10/0] via 192.168.13.176, wan1C 10.0.0.0/24 is directly connected, WiFiC 192.168.10.0/24 is directly connected, LAN_SF_SWITCHC 192.168.13.177/31 is directly connected, wan1NSE8-lab-FGT200F # == [ wan1 ]name: wan1 mode: static ip: 192.168.13.177 255.255.255.254 status: upnetbios-forward: disable type: physical netflow-sampler: disablesflow-sampler: disable scan-botnet-connections: disable src-check: enablemtu-override: disable wccp: disable drop-overlapped-fragment: disabledrop-fragment: disableUse edit 0 to add new entries
When creating a new entry in config submode, many times you have to specify this entry running number. If you give the existing entry number, you will not add, but edit this existing entry. You have to provide unused entry number to create a new entry. These running numbers are for Fortigate reference only, they do not signify order of the entries. So not to come up with big unused number, use edit 0 and this will create a new entry with the next available running number.
Use move to change order of entries
Using move from to destination allows us to rearrange entries inside the relevant config submode. We have to use entry’s running numbers for source and destination. Let’s say we want to move security policy rule 22 higher than rule number 13:
config firewall policy move 22 before 13endUse delete to remove an entry
With delete entry-number command in config submode we can delete the given entry.
config firewall policy delete 13endUse (with caution!) purge to delete the whole table
This command deletes the WHOLE table you are currently in. Most configurationsettings in Fortigate are collected in tables. E.g. all security rules arecontained in the firewall policy table. In rare cases when you need to deleteall the entries in such tables, the command purge does just that.
Let’s delete, for example, all security rules of the firewall:
config firewall policy(policy) # purge <Enter>This operation will clear all table!Do you want to continue? (y/n)yThe result is empty rulebase:
(policy) # showconfig firewall policyendWarning | There is no undo to this deletion, so be careful in whatsubconfiguration mode you currently are. |
Objects with names can be renamed with rename
To rename a named object, enter the appropriate config submode and run rename current-name to new-name. E.g.:
config firewall addrgrp rename TEST_GROUP to PROD_GROUPendWorkspace Mode - missing commit for configuration changes? Here it is to prevent concurrent changes, partial configuration and more
This feature (Workspace Mode) was introduced in FortiOS 6.2 and makes possibleto combine multiple CLI commands into a batch, which is later committed in onego as a single action. This (finally) allows us to, for example, change WANfacing IP address of the interface and its default gateway without losing accessto the Fortigate. But this feature deserves more than a short-tip treatment andso I wrote a post about it -Fortigate new Workspace Mode to commit changes in a batch - with an example of changing default gateway
Follow me on https://www.linkedin.com/in/yurislobodyanyuk/ not to miss what I publish on Linkedin, Github, blog, and more.
