
Context is all you need: Better AI results with custom instructions
March 26, 2025 by Rob Conery, @robconery.com, Burke Holland, @burkeholland
Earlier this month, we announced the general availability of custom instructions in Visual Studio Code. Custom instructions are how you give Copilot specific context about your team's workflow, your particular style preferences, libraries the model may not know about, etc.
In this post we'll dive into what custom instructions are, how you can use them today to drastically improve your results with GitHub Copilot, and even a brand new preview feature called "prompt files" that you can try today.
Smaller prompts, better results with a simple Markdown file
Working with GitHub Copilot can supercharge your development process, but there is a learning curve when it comes to prompting effectively. It can take a few tries to get the right answer you want, which usually means rephrasing your question or prompt. Even then, Copilot will speed up your workflow!
But did you know that you can "tune" GitHub Copilot to better suit your needs? By using a simple Markdown file, you can provide Copilot with specific instructions that will help it understand your project better. In this post, we'll walk you through the process of creating and using custom instructions, a newly-released feature in VS Code.
Try this: create a file in your project called .github/copilot-instructions.md. This file will contain instructions that help Copilot understand your project better. It's automatically picked up by Copilot, so you don't have to do anything special to make it work.
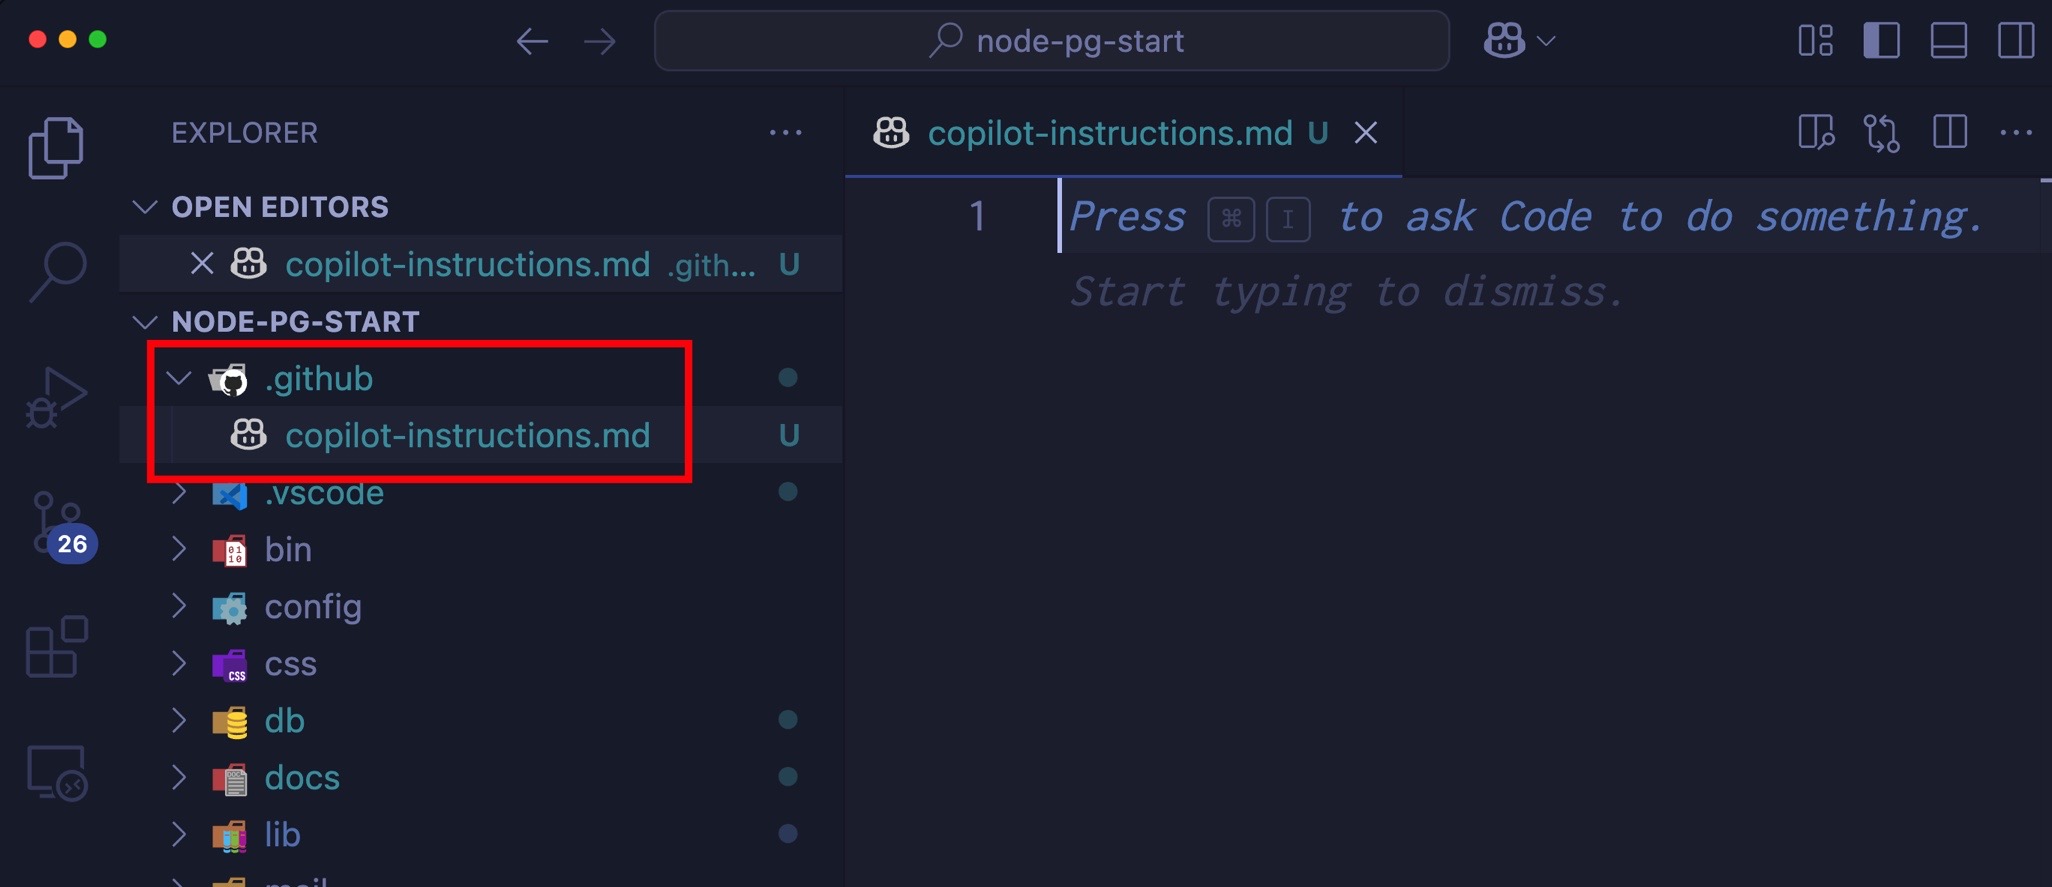
Add these instructions to the file:
# Copilot InstructionsThis project is a web application that allows users to create and manage tasks. The application is built using React and Node.js, and it uses MongoDB as the database.## Coding Standards- Use camelCase for variable and function names.- Use PascalCase for component names.- Use single quotes for strings.- Use 2 spaces for indentation.- Use arrow functions for callbacks.- Use async/await for asynchronous code.- Use const for constants and let for variables that will be reassigned.- Use destructuring for objects and arrays.- Use template literals for strings that contain variables.- Use the latest JavaScript features (ES6+) where possible.The title isn't strictly necessary, but it helps to clarify the purpose of the file. The rest of the content is a set of instructions that help Copilot understand your project better. You can customize these instructions to fit your project's needs.
Now, open up the Chat view and prompt it with an extremely terse command, such as tail recursion. You don't have to ask "how do I do tail recursion in JavaScript" or something similar. Just type tail recursion and hit Enter. Notice that Copilot understands the context of your project and provides you with a relevhttps://code.visualstudio.com/assets/blogs/2025/03/26/tail-recursion.jpg2025/03/26/tail-recursion.jpg" alt='Screenshot that shows the Copilot response for "tail recursion" in the Chat view.' loading="lazy">
Notice that Copilot gave you a more detailed answer, in the format that you expected (2 spaces, camelCase, etc.), even though you used a much smaller prompt.
That's the power of using custom instructions! But there's so much more you can do...
Customize all the things!
GitHub Copilot adds so many great features to VS Code, including the ability to generate your commit messages, review selected code, and even generate tests!
These are all useful, but it's likely that you have your own way of doing these things. The good news is that you can personalize them by overriding a few settings in your workspace.
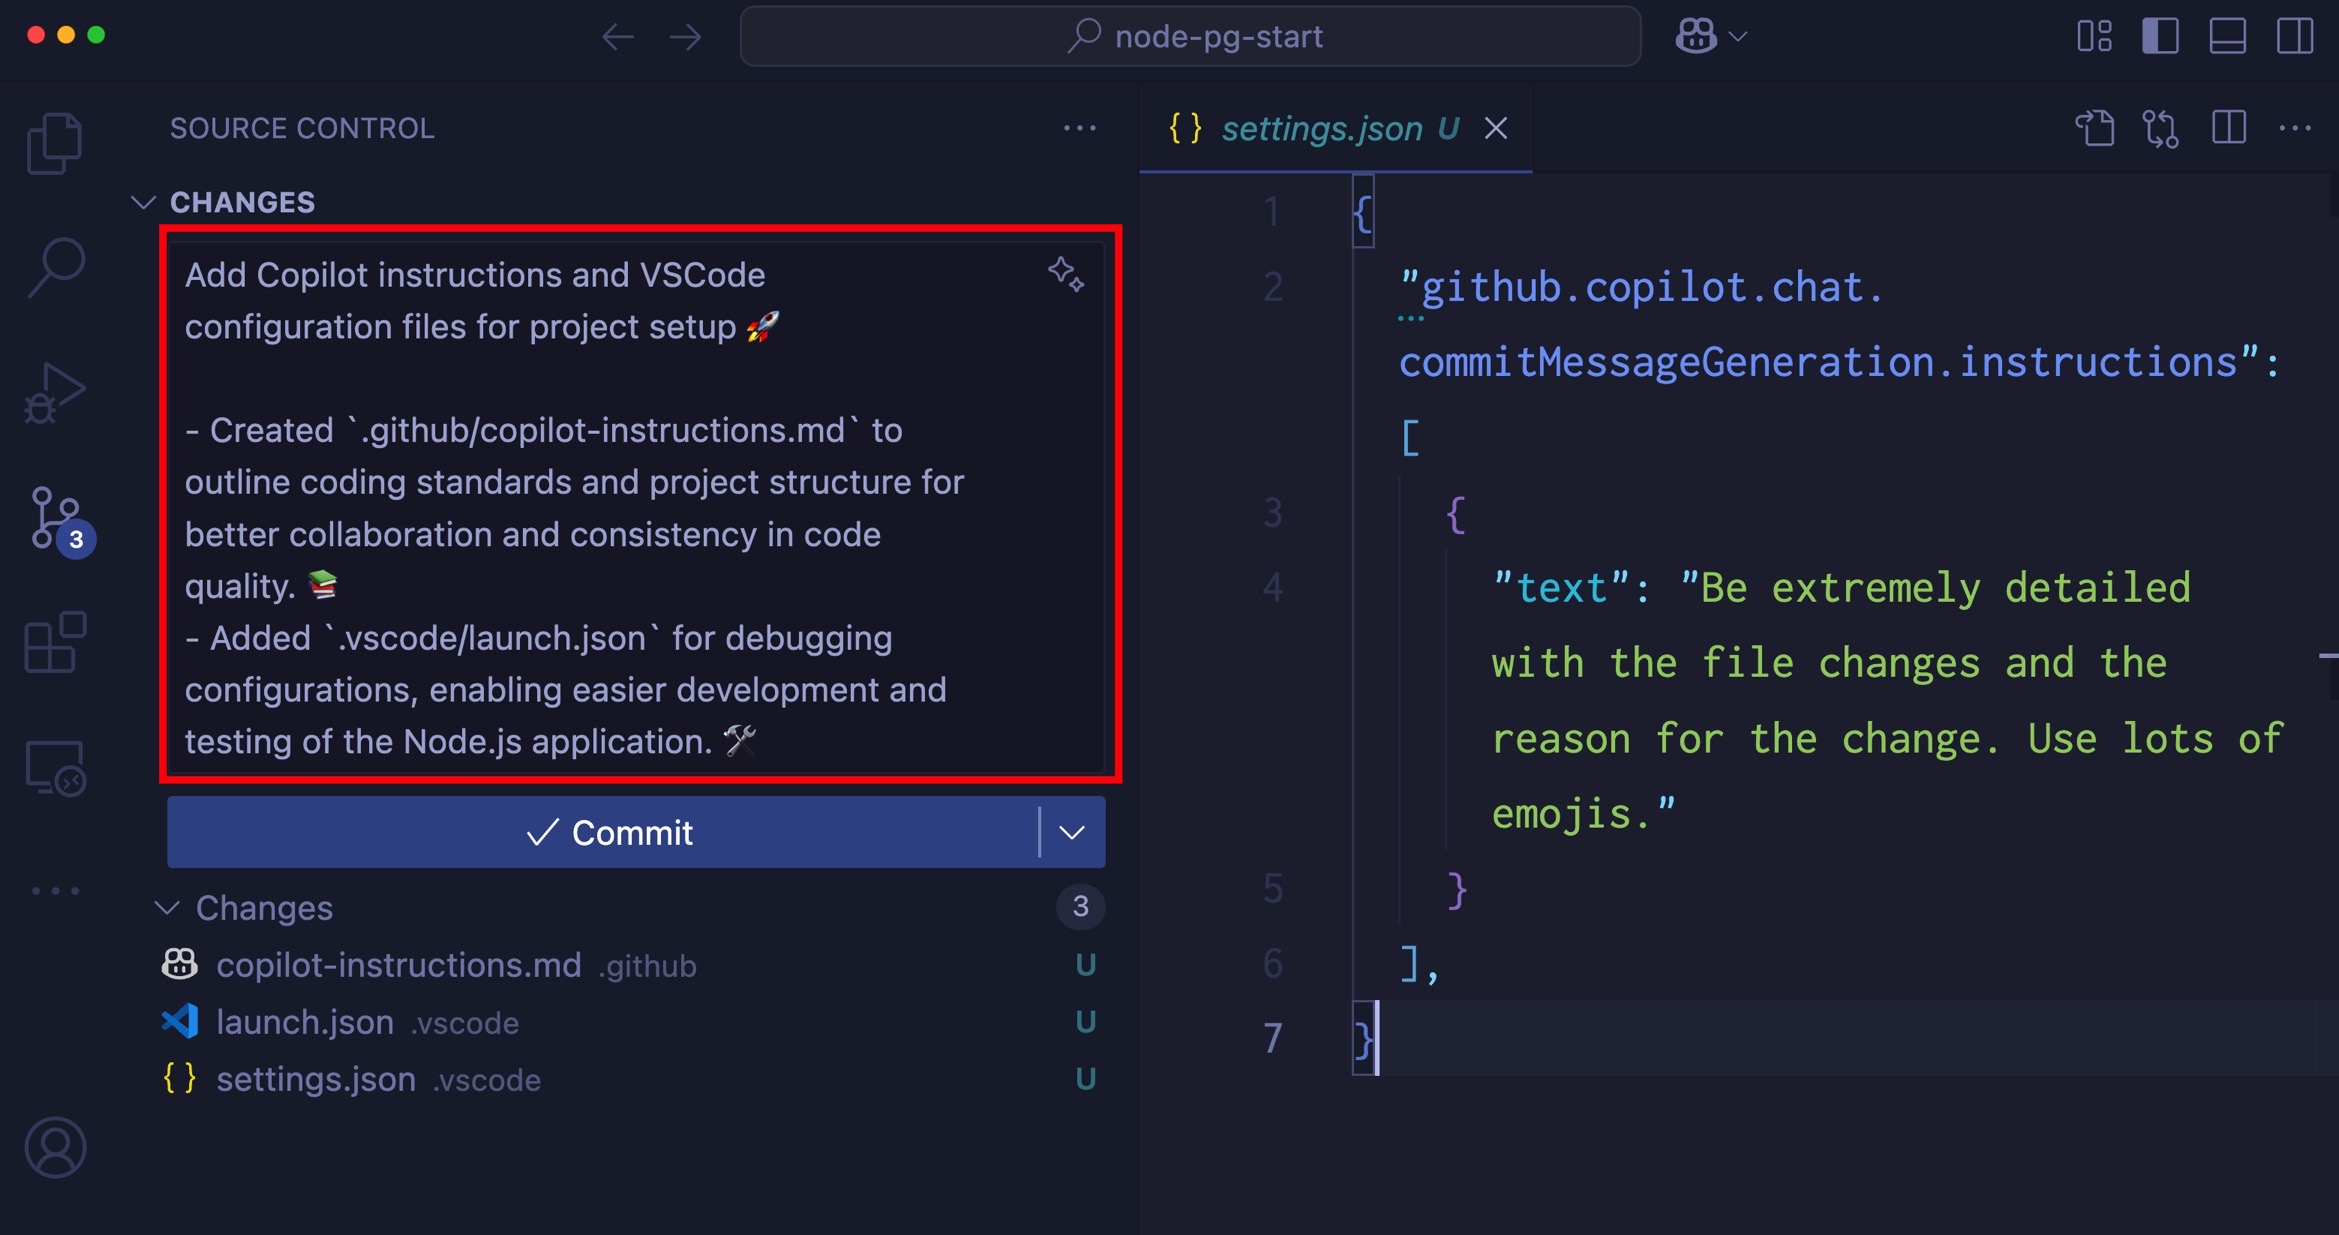
Try this: open the Command Palette (⇧⌘P (Windows, Linux Ctrl+Shift+P)) and type the phrase "workspace settings". You should see a menu option that says Preferences: Open Workspace Settings (JSON). Select that option and add the following settings to your workspace:
{ "github.copilot.chat.commitMessageGeneration.instructions": [ { "text": "Be extremely detailed with the file changes and the reason for the change. Use lots of emojis." } ]}Save the settings.json file and close it. The Source Control icon in the Activity Bar should now indicate that you have changed files. If you're working in a test directory without a Git repository, you can create one right through the Source Control view. Just select the Initialize Repository button and follow the instructions.
Here's where the fun starts: open the Source Control view and select the sparkle icon in the commit message input field. This instructs Copilot to generate a commit message for you. Notice that it generates a commit message that is exthttps://code.visualstudio.comhttps://code.visualstudio.com/assets/blogs/2025/03/26/git-commit.jpg!
Comment out the instructions in your settings.json file and generate the commit message again. You should see a far less detailed commit message that doesn't use any emojis.
Writing good, detailed commit messages is a skill that takes time to learn. But with Copilot, you can save yourself a ton of time and result in better messages.
Going all in with custom instructions
You might have your coding standards in separate files with different formatting other than Markdown. Maybe you have one for JavaScript, one for Python, and one for Go. You might also have standards for how you work with databases - the data types you use, naming convention, connection string handling, and more.
You don't have to combine all of these into one file. You can keep them separate and still use Copilot to help you with all of them!
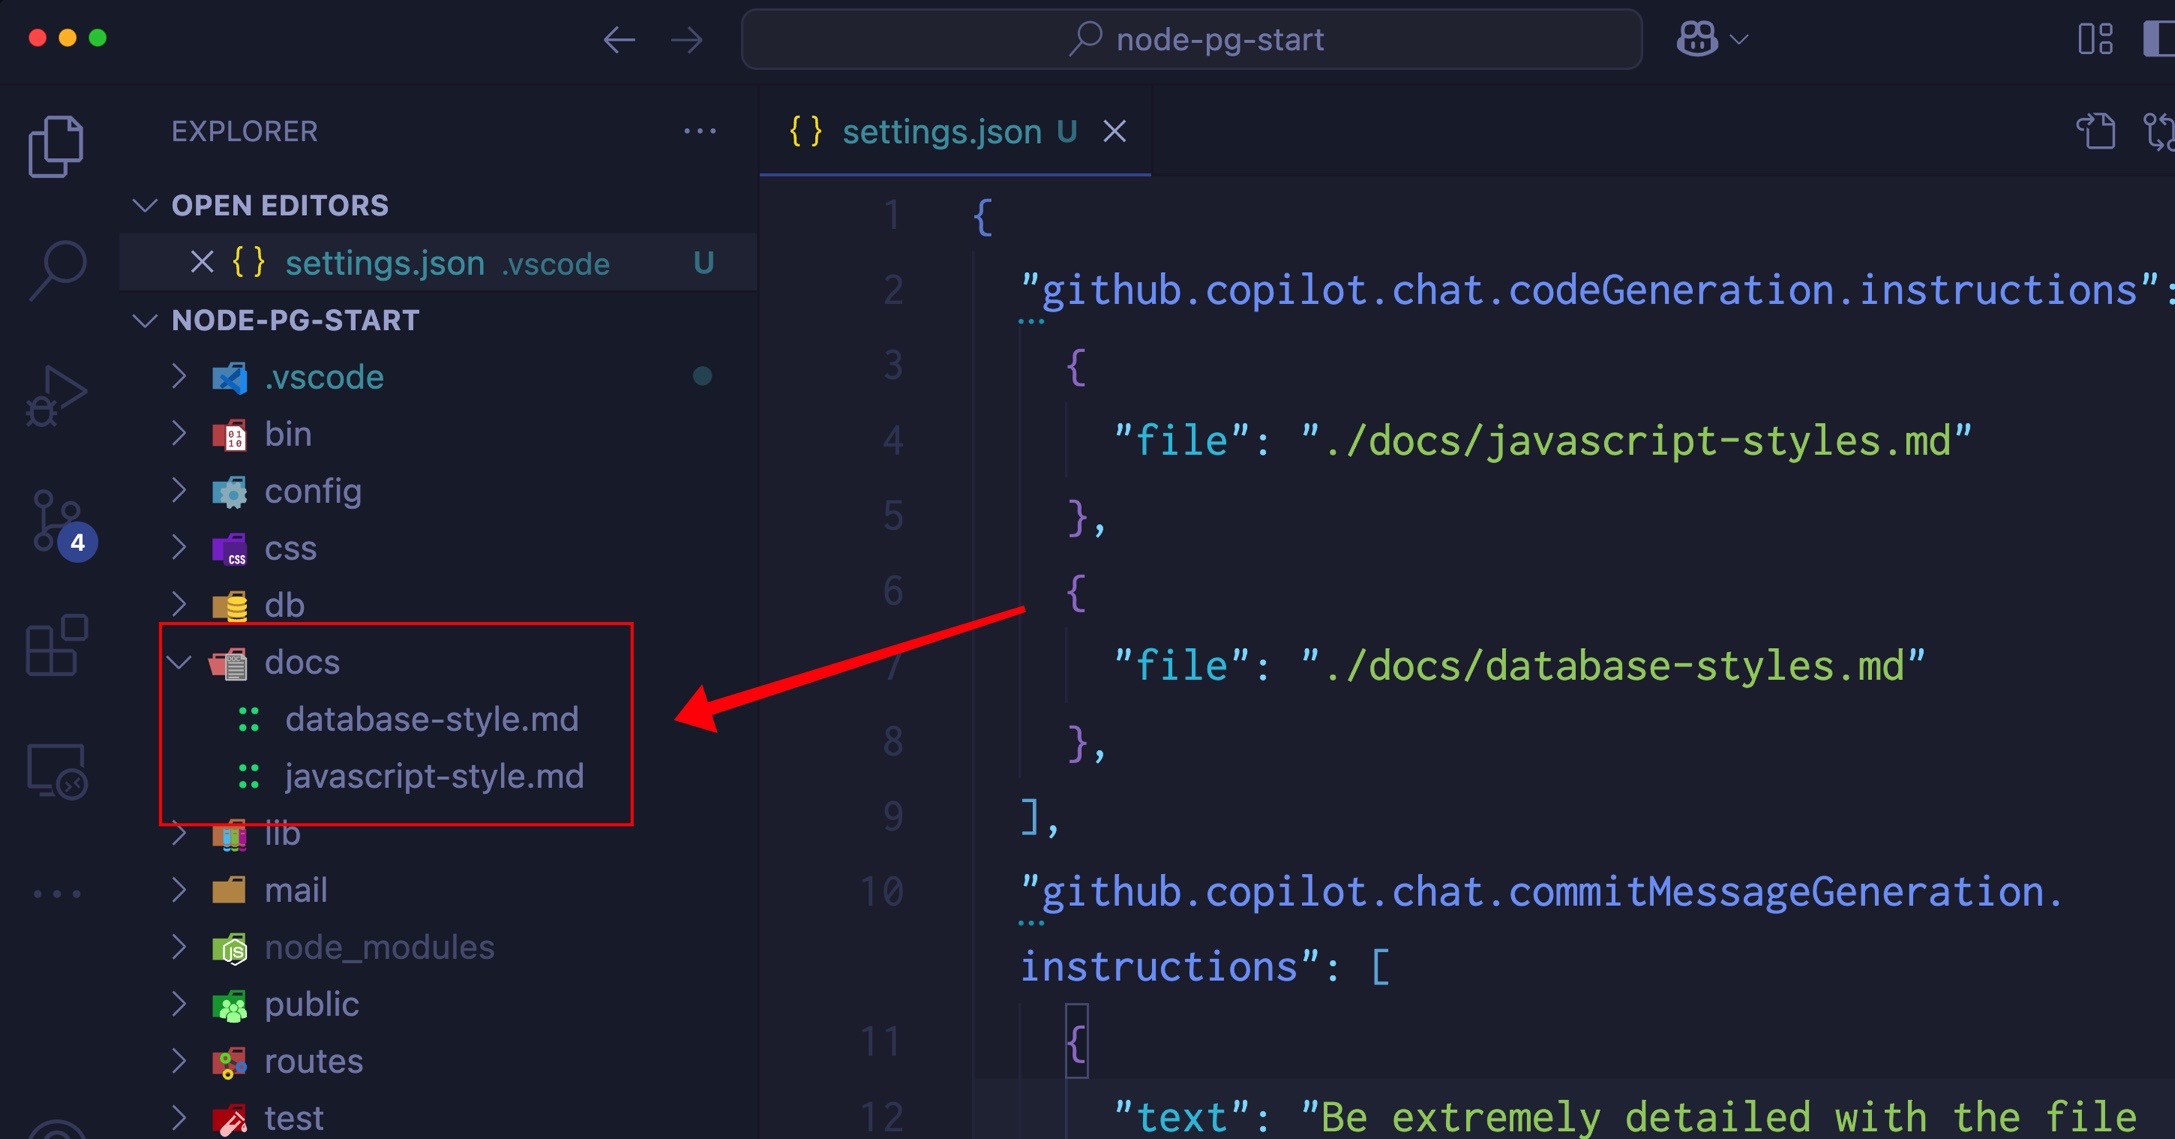
Let's try it! Open your .vscode/settings.json file (workspace settings) and add the following settings:
{ "github.copilot.chat.codeGeneration.instructions": [ { "file": "./docs/javascript-styles.md" }, { "file": "./docs/database-styles.md" } ]}This is instructing Copilot to look for two files in the docs directory: javascript-styles.md and database-styles.md. You can add as many files https://code.visualstudio.comhttps://code.visualstudio.com/assets/blogs/2025/03/26/docs.jpgk for them in the order you specify.
You can add whatever files you like in here, including specifications for the current sprint you're on. We've even seen people add Gherkin specs as custom instructions!
Give it a try!
Change the model tone
Models tend to be overly polite. They apologize a lot and hardly ever stand up for themselves and the decisions they made if you tell them something is wrong. When you're trying to get work done, this can be annoying. You can override the overly-helpful tone of the model with a few instructions on how you want it to respond.
- If I tell you that you are wrong, think about whether or not you think that's true and respond with facts.- Avoid apologizing or making conciliatory statements.- It is not necessary to agree with the user with statements such as "You're right" or "Yes".- Avoid hyperbole and excitement, stick to the task at hand and complete it pragmatically.It's important to always give models instructions in the affirmative instead of the negative as they need to know what to do, not what to not do. Instead of saying "don't do" you can say "avoid".
Experiment and have fun! One programmer reported that they liked to liven up their test suites by generating tests in haiku. This seems a little extreme, but if you're working on a hobby project, why not? You can add instructions like:
- Generate tests in haiku format.- Use 5-7-5 syllable structure.- Use nature themes and imagery.One more thing...
GitHub Copilot can understand code files as custom instructions too! If you have a SQL file, for instance, you can add that to your settings and Copilot will use it to help generate your data access code.
If you have a particular data access tool that you like, you can add a sample to your project and Copilot will use that when generating the data access code.
Try it! Here's an example that one of our team members used to generate a Sequelize model (Node.js ORM) for a PostgreSQL database:
//Template for a Sequelize modelconst { DataTypes, Model } = require('sequelize');class User extends Model { //static or factory methods //instance methods}const init = function(sequelize){ User.init({ //schema goes here }, { hooks: {}, tableName: "users" underscored: true, sequelize })}exports.createUser = function(sequelize){ init(sequelize); return User;}Reference this file in your settings and GitHub Copilot will use this template, together with your SQL file to generate the models in your project for you. You can do this in either Edit or Ask mode. Just use the prompt generate the data access for the project and boom! Magic!
Introducing prompt files
Prompt files allow you to compose reusable prompts for yourself and your team. This helps enforce consistency while at the same time reducing prompting, which can become tedious.
For example, let's say you wanted to create a reusable prompt that would create an interface based on the database schema. You could create a prompt file that contains your database schema. Copilot is more than happy to generate a SQL script to do that for you.
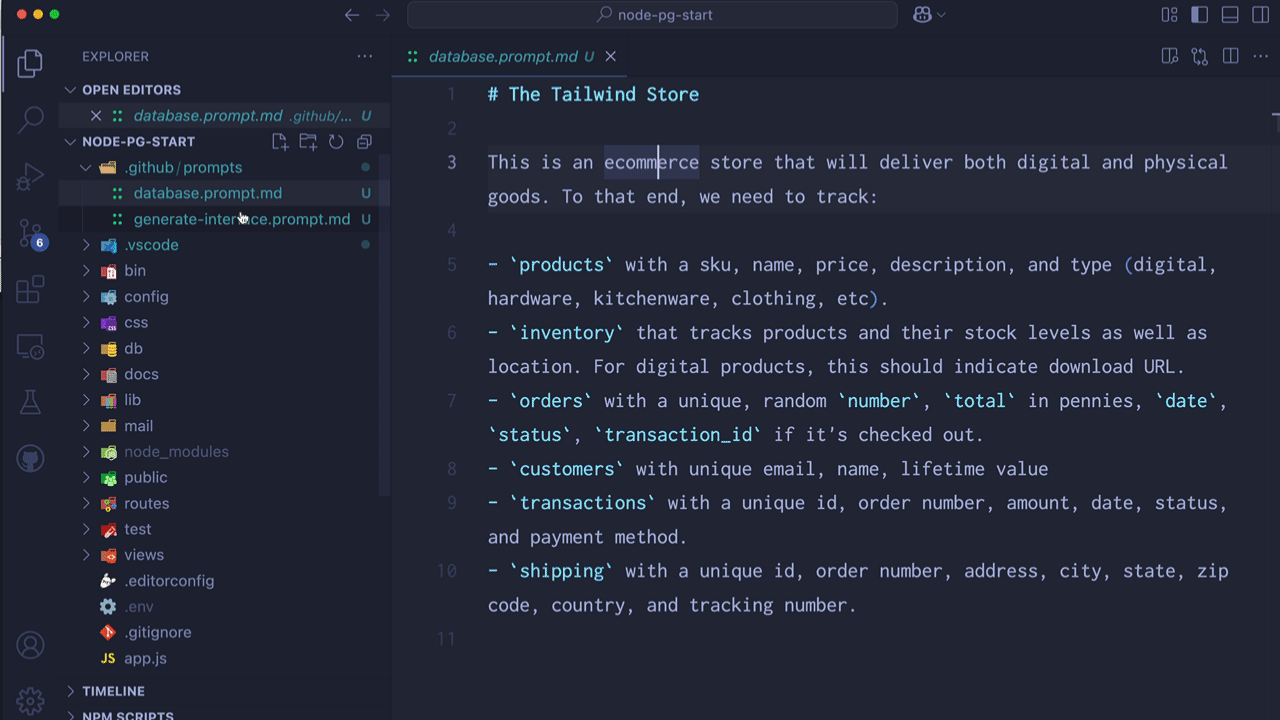
Prompt files go in the .github/prompts directory and are just Markdown files with a name in the format *.prompt.md.
You might have a .github/prompts/database_users.prompt.md that contains a description of your database. For example:
# User AuthenticationOur application will have `users` with the following information:- The standard user information, including: `name`, `email` (unique).- A link for a "magic" login, which will be a `GUID` as well as the expiration date for the link.- Social login account IDs for Microsoft, GitHub, and Google.- The timestamp of the last login.- The timestamp for when the user was created.You can then create another prompt file called generate-interface.prompt.md that contains the instructions to generate the interface. Prompt files can reference each other, so you can pass the database schema into this prompt file as a simple Markdown link.
Generate a TypeScript interface for the table specified by the user. Refer to the [user schema](database_users.prompt.md).To use these prompt files in chat, use the attach button (paperclip) or use . Select Prompts from the menu, and then select the prompt file you want to use. Notice that when I use the generate-interfachttps://code.visualstudio.comhttps://code.visualstudio.com/assets/blogs/2025/03/26/prompts.gifcally pulls in the database_users.prompt.md file.
Conclusion
VS Code is a customizable assistant that, when properly configured, can become an integral part of a team's workflow. With custom instructions, the control is in the hands of the developers.
Happy Coding!
