
Bridging the gap between visual design and production-ready code has always been a top priority for most product teams. Figma MCP (Model Context Protocol) is a solution to this problem. MCP allows AI code generators like Cursor to understand your design at a semantic level, not just mimic it visually.
In this guide, I’ll walk you through everything you need to know to start using Figma MCP — from setup in Figma & Cursor to troubleshooting common problems, with real-world examples showing why this method is a leap forward for design-to-code workflows.
https://medium.com/media/60d24f2ace52d0245c714538fcaf8626/hrefWhat is MCP
MCP stands for Model Context Protocol, and it’s an open standard that enables large language models (LLMs) to interact with external tools, systems, and data sources. It allows AI applications to access and utilize information from the internet, making them more powerful and versatile.
In the context of Figma, MCP enables Figma and the AI-powered development environment to interact with each other, minimizing the gap between design and code.
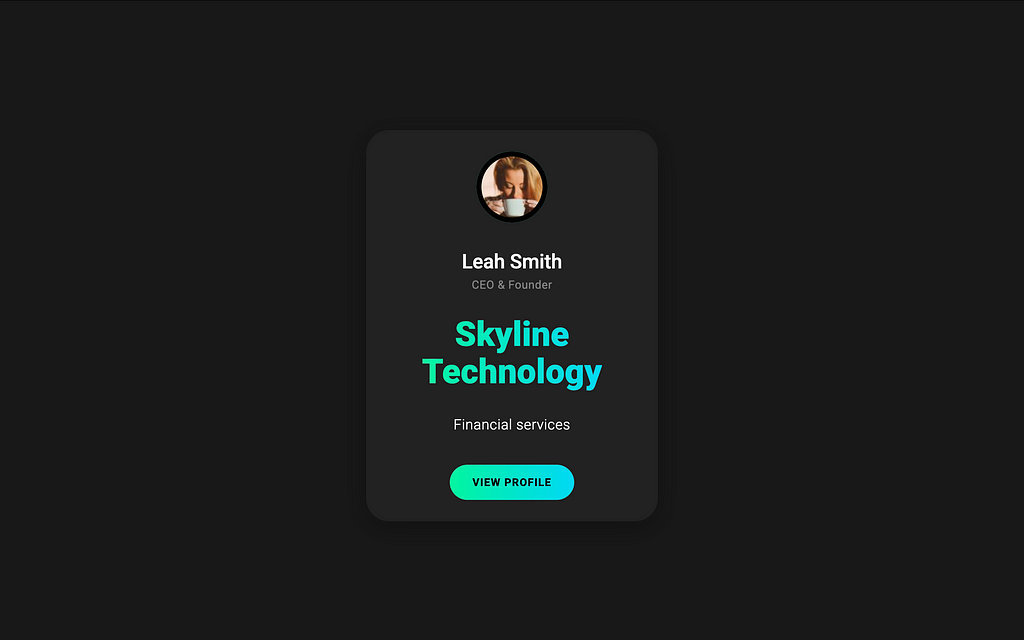
Below I will show you how to use MCP to turn your Figma card design into code.
Why you want to use MCP
I’m starting to see more and more comments like this:
“Don’t see a reason to use MCP. I can simply take a screenshot of my design, attach this image in Cursor, and ask it to code it!”
While, in general, this approach of turning a screenshot into a working solution works fine, it has one but important limitation — Cursor will parse the image to generate code and it won’t have an in-depth understanding of your design. But when you use MCP, and feed Cursor Figma link with your design it will have a semantic understanding of your design: Cursor will have design token awareness and semantic precision.
- Cursor can access the exact variable names (e.g., color, spacing, typography)Cursor knows hierarchy, variants, constraints.
It means that you will get a much better alignment between design and code, and that’s what makes MCP super valuable — it allows generating code aligned with your design system.
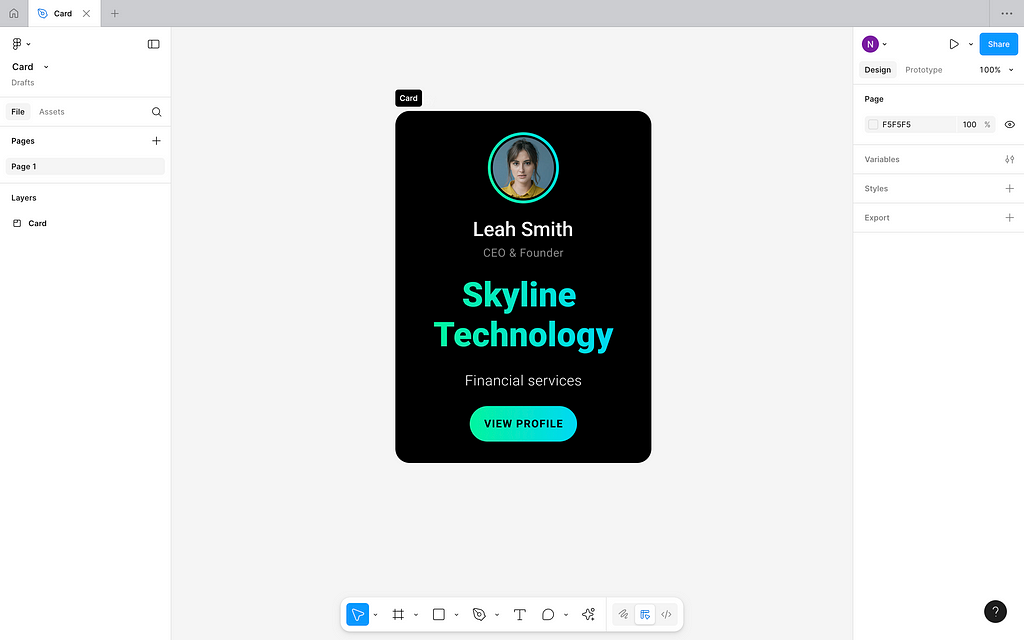
Even for simple designs, the difference between 2 approaches is clearly noticeable. Let me demonstrate it on our card example. Below is my attempt to attach screenshot of card (referenced above) and prompting Cursor to code it in HTML and CSS.

Here is a result of this operation:
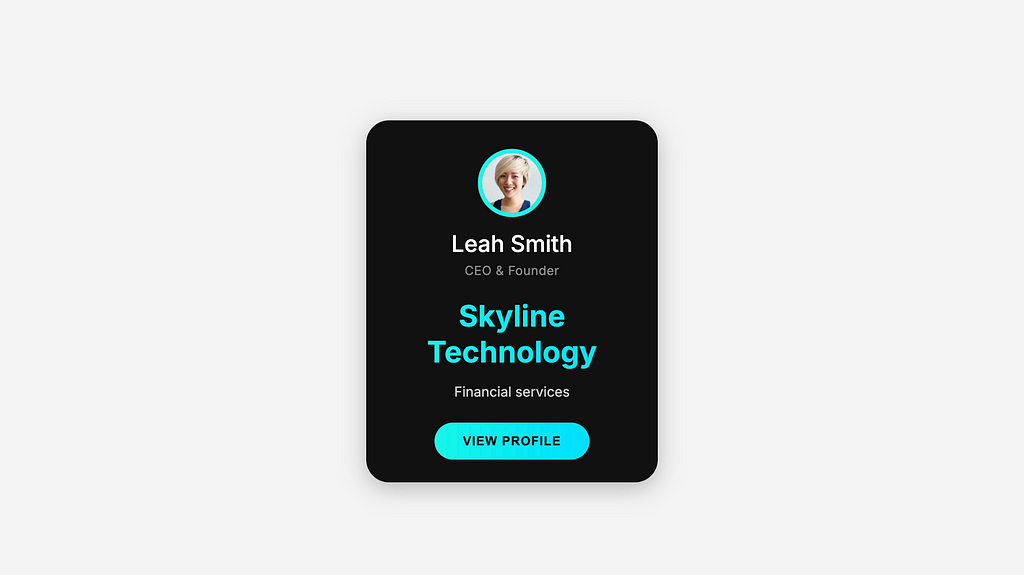
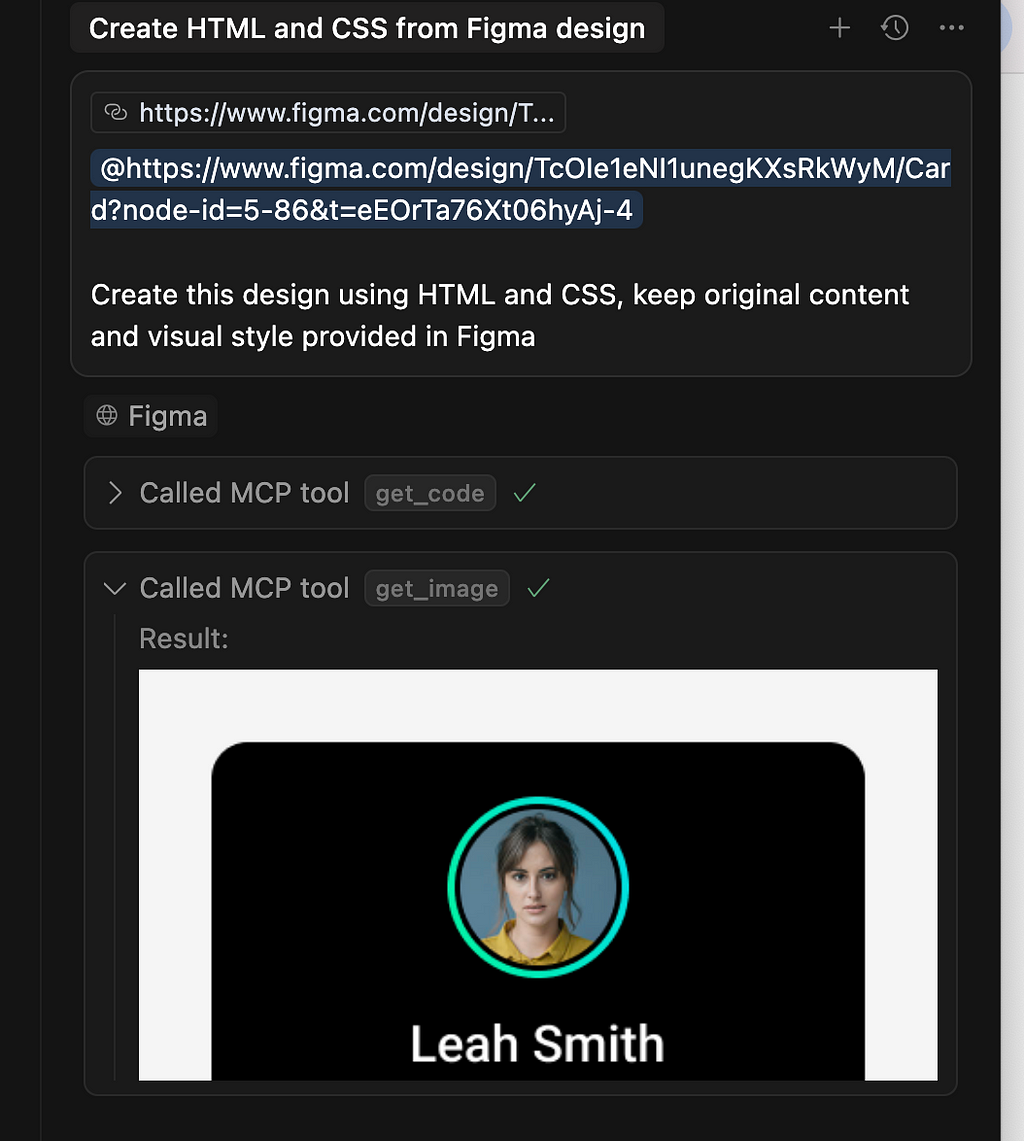
Lets make another try, but this time with MCP and link to Figma with design.
And here is a design generated with the Figma MCP (side note: yes, it also has some visual difference with the original design, but I think it’s better aligned with the original design).
What you need to use Figma MCP
- Figma Desktop app. Figma MCP doesn’t work in a browser version of Figma as it requires running an MCP server on your local machine.Code editor. Cursor, VS Code, or Windsurf will work fine.Time for debugging. Figma MCP is still in beta, and it can be unstable. I’ve referenced solutions to common problems below.
How to set up Figma MCP
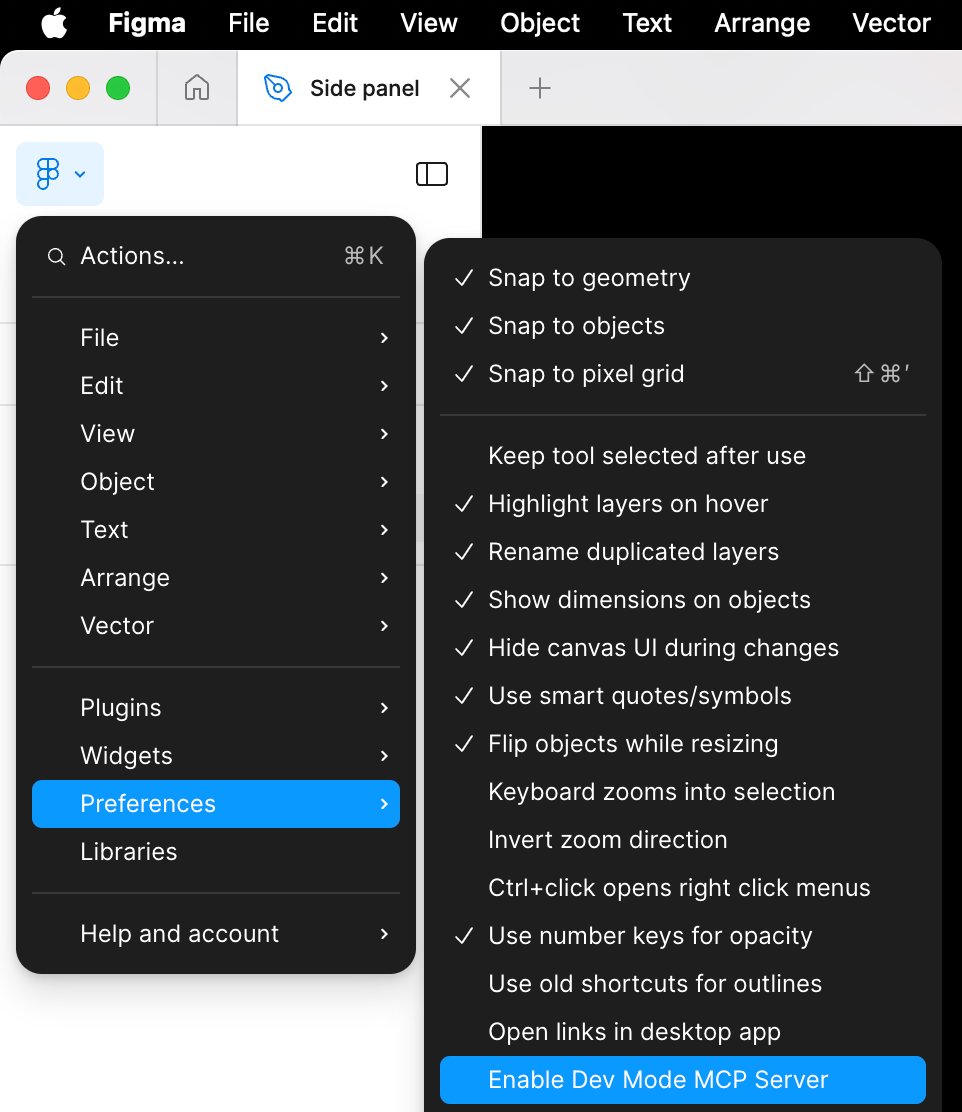
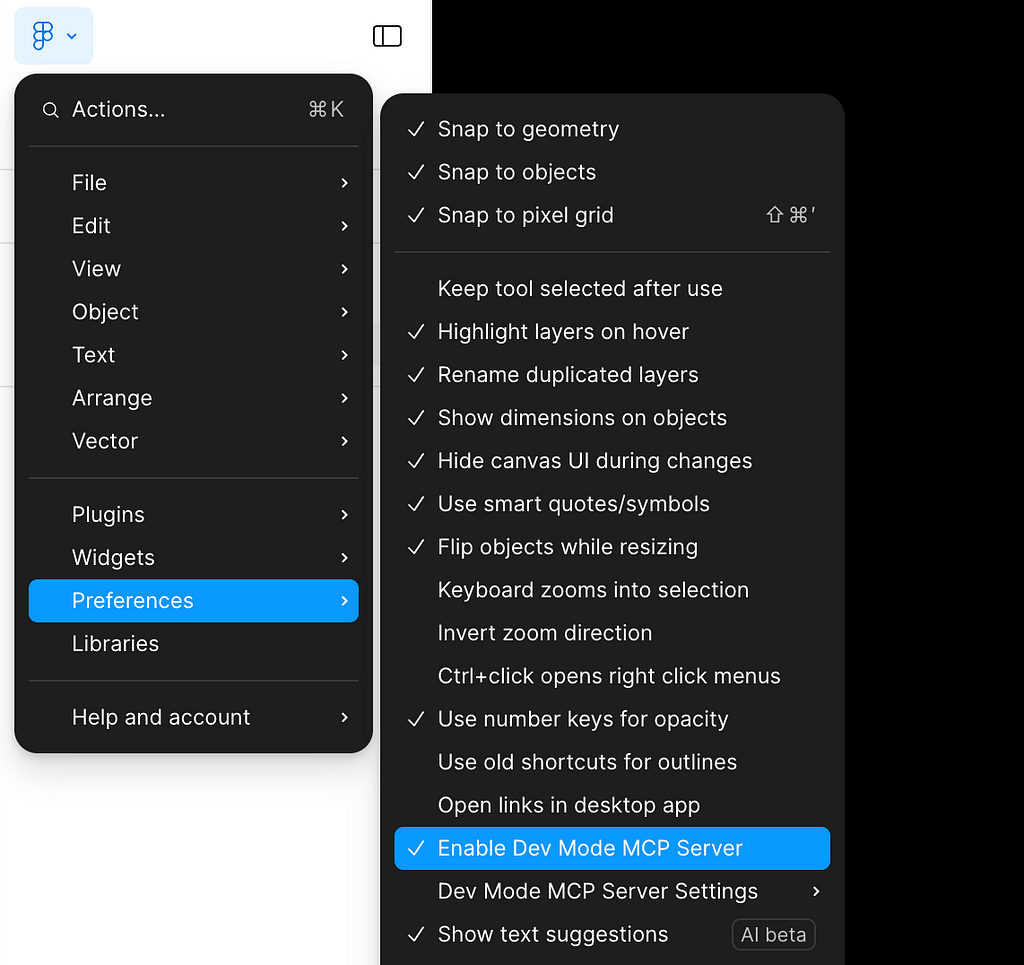
Its very easy. All you need to do is enable the Figma MCP Server in the Figma Desktop app (shown below). Before doing that, I recommend you update the Figma app to ensure you’re running the latest version of Figma.
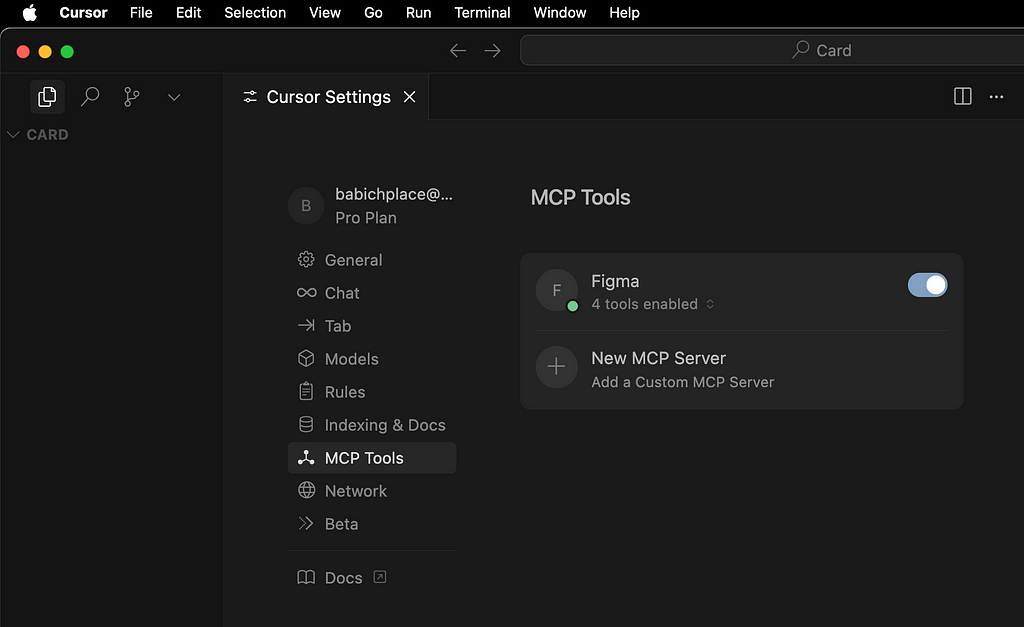
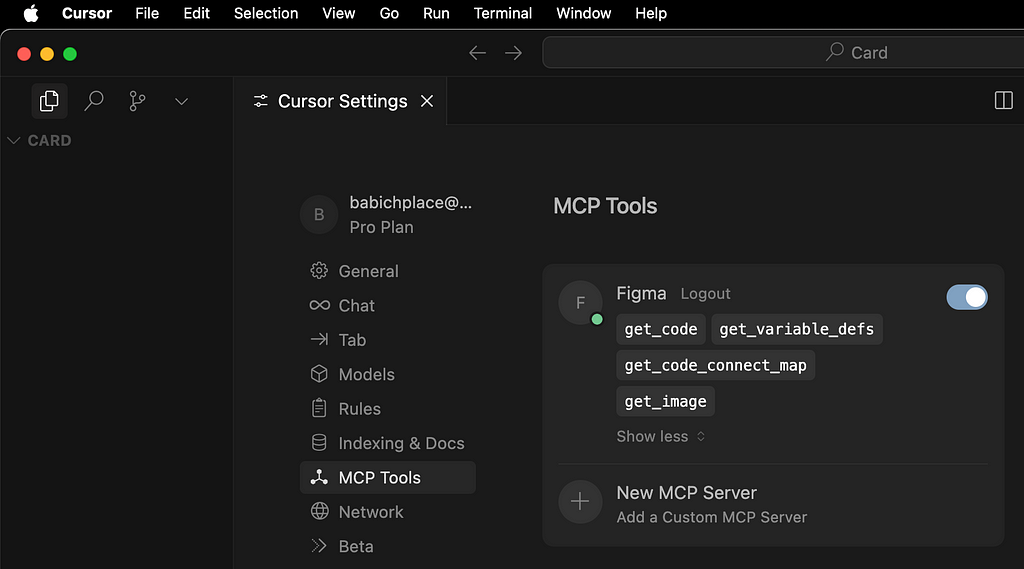
Then, in your code editor (in my case, Cursor), you need to configure the MCP client. Click Cursor → Settings → Cursor Settings → MCP Tools. Choose a New MCP Server.
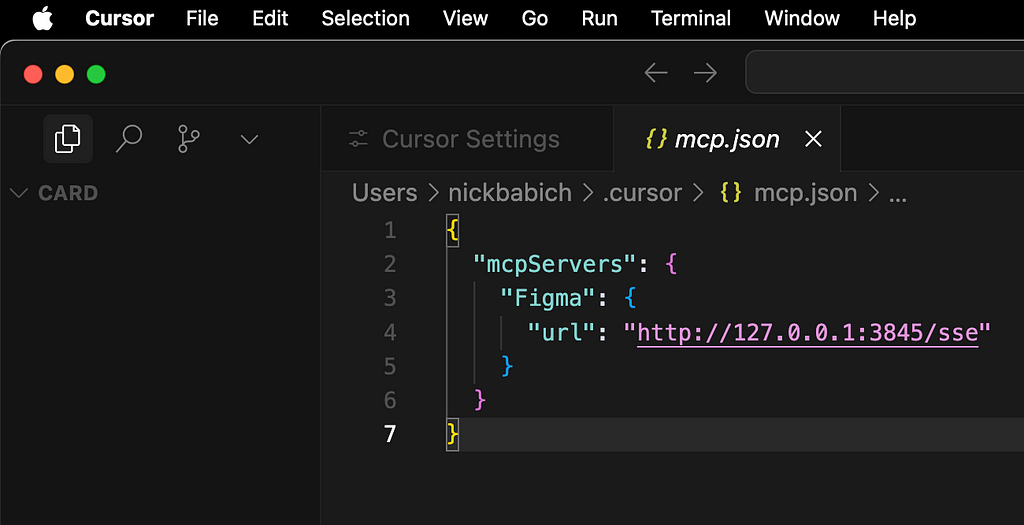
And write configuration for your code environrment. Here a configuration for MCP Server for Cursor:
{
  "mcpServers": {
    "Figma": {
      "url": "http://127.0.0.1:3845/sse"
    }
  }
}
This is how it looks to me:
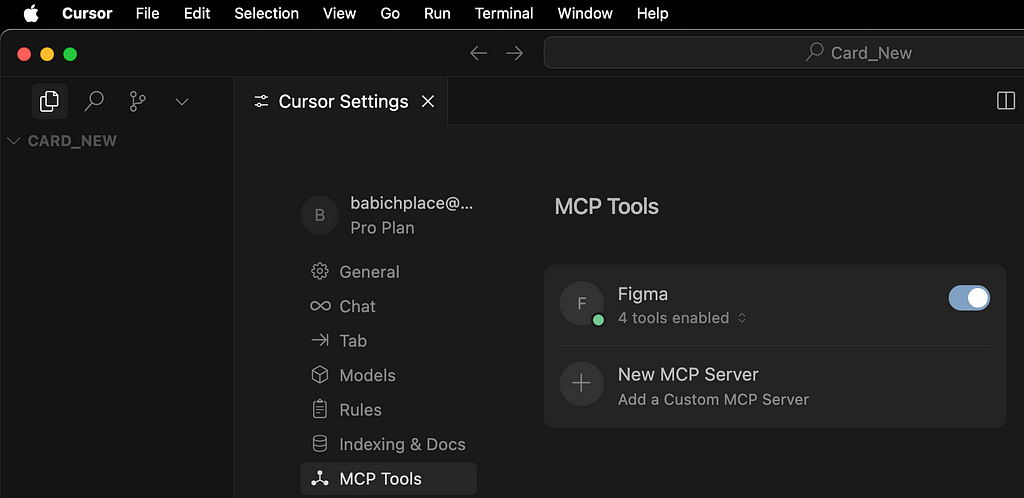
If you do it correctly, you will see the following state: Figma with a green badge, indicating a successful connection.
How to use Figma MCP
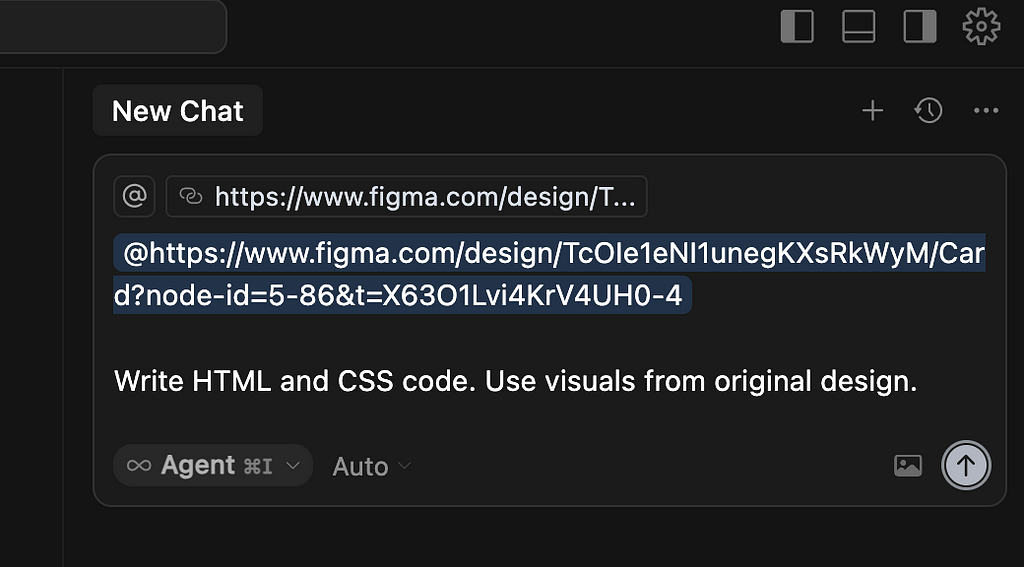
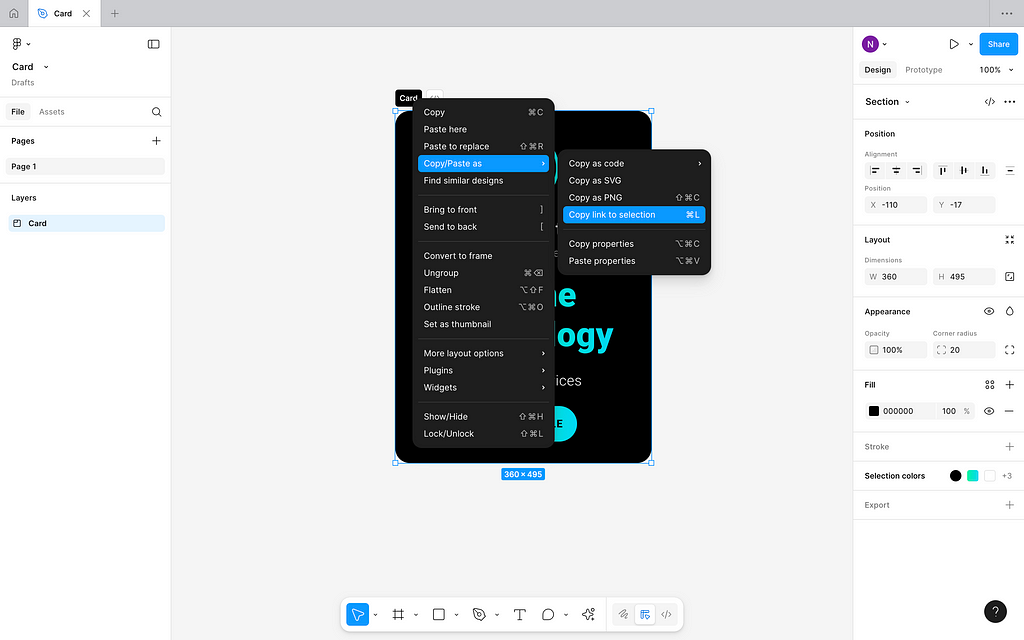
Also easy. All you need to do is to copy a link to the section of your design in Figma. Right mouse click on the frame, select Copy/Paste as, and choose Copy link to section.
Add this link to the Cursor AI chatbot input field and provide a prompt.
Solving typical problems
Error when using ‘get_code’ tool
If you see error message like for ‘get_code’ MCP method in Cursor output:
The Figma design at this link references a “[Name of component]” component, but the code export suggests the main content is currently missing or hidden.
It’s a clear indication that Cursor cannot get design from Figma. Without fixing this problem, the Cursor will code some generic design, and it will mention that in the output:
Since the actual card content is not visible, I will create a generic card layout using these styles in HTML and CSS. You can later adjust the content as needed.
To solve this problem, do two things:
Step 1: Restart Figma MCP Server. In Figma for Desktop, navigate Preferences → Enable Dev Mode MCP Server. Turn it OFF and then ON.
Step 2: Restart MCP Client in Cursor. Click Cursor → Settings → Cursor Settings → MCP Tools. Turn the toggle for Figma off and then On.
Error when using ‘get_image’ tool
get_image allows Cursor to fetch embedded images for processing or summarization. For example, this method will be used to extract additional visual attributes from the design of a UI card.
If you see error message like this one:
Your request failed. Please try again. Request id: [number]
It can be a clear indication that get_image is not working properly. Based on my experience working with this method, there are two main issues with it:
Issue 1: get_image fails when you select large areas of your design. Currently, when you select large areas in your Figma design and pass this link to Cursor, the get_image function cannot process them within the defined timeout, resulting in an error. To solve this, you can feed Cursor smaller areas of your design and then iterate from it (side note: I know that this is not an optimal solution, yet it works).
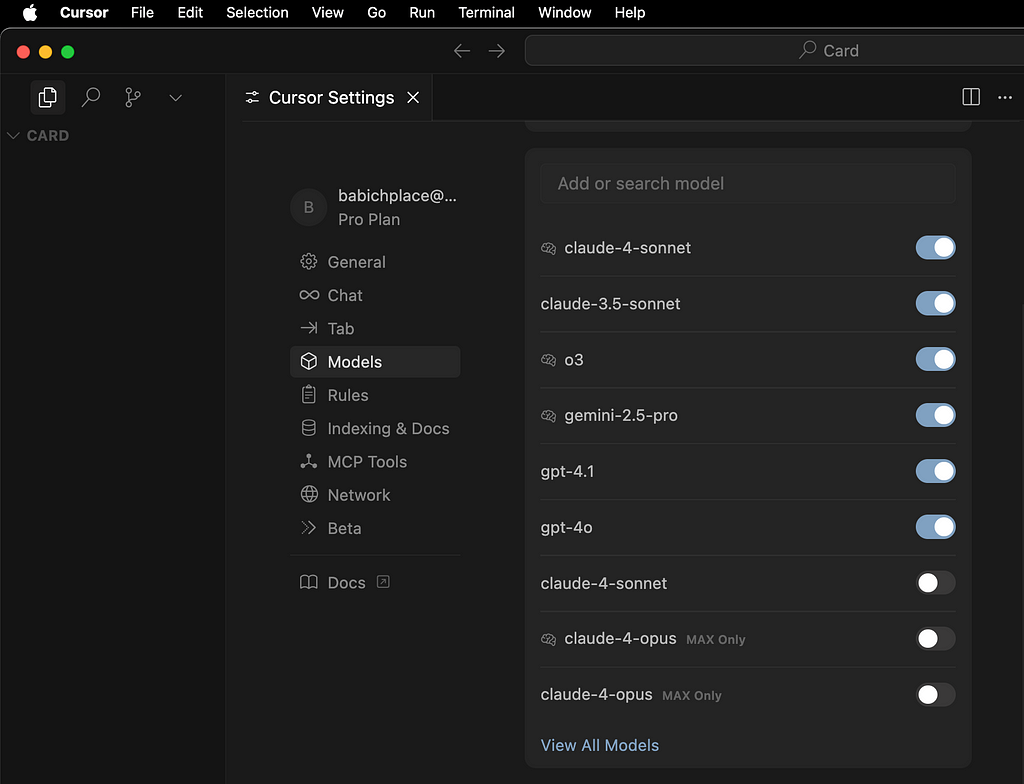
Issue 2: get_image can be unstable with Claude-4-sonnet and Gemini 2.5-pro models. You can disable this model in Cursor globally (Cursor → Cursor Settings → Models and turn off Claude-4-sonnet model, leaving only Claude-3.5-sonnet model).
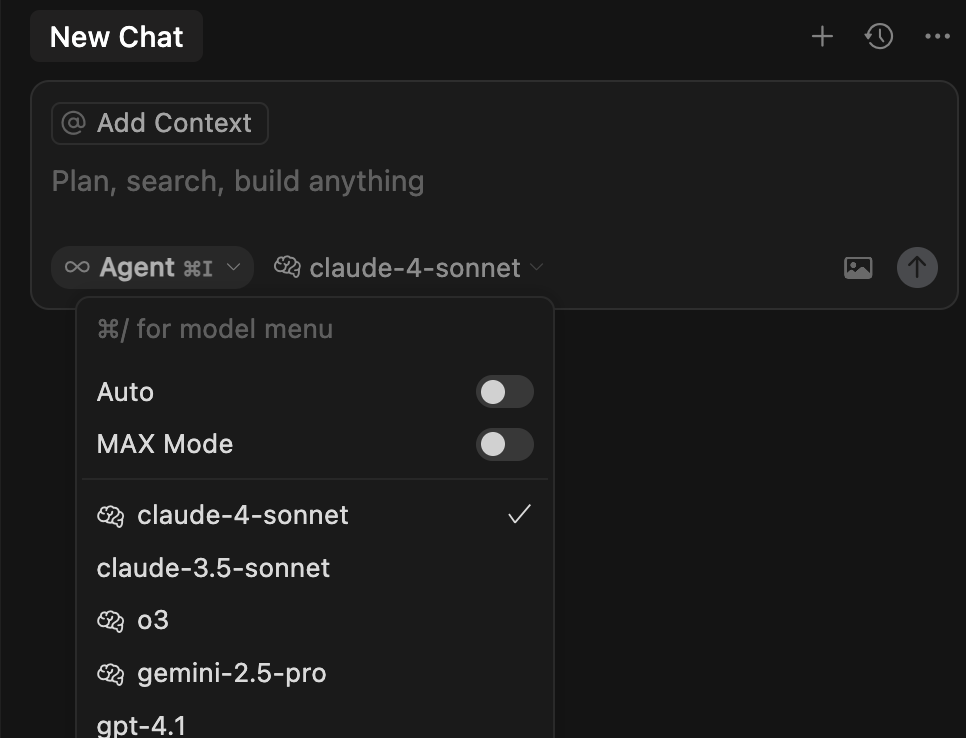
Or you can do it locally, in the context of the chat window.
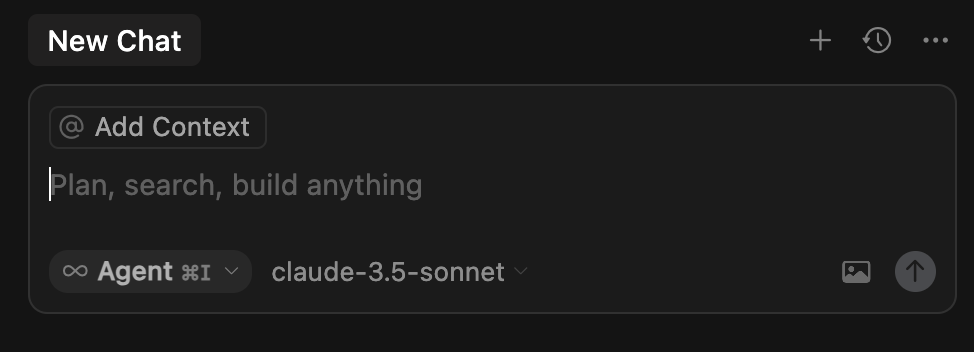
So, if you choose claude-3.5-sonnet, you chat window will look like this:
Note that this decision will have a negative impact on the code that Cursor will generate for you (as claude-3.5-sonnet is the older model in comparison to 4, which is considered the most advanced model at this moment).

Figma MCP: Complete Guide was originally published in UX Planet on Medium, where people are continuing the conversation by highlighting and responding to this story.
