
How I Built an Amazing Web App in 20 Minutes with Figma MCP + Cursor
Recently, Figma introduced an exciting new integration called Dev Mode MCP, which connects seamlessly with various AI models, enabling them to fetch design contexts directly from your local Figma designs. Intrigued by the possibilities, I decided to test this out myself over the weekend, and the results were astonishing!
https://medium.com/media/fb606cd70a66ecb455f1d4f96f976668/hrefThe Problem with Previous Approaches
Before MCP integration, generating code from AI typically involved providing static images of Figma designs. Unfortunately, this often led to subpar outputs because images couldn’t communicate the rich context of variables, tokens, and design systems embedded within Figma.
However, with Figma’s new MCP server integration, the AI model receives complete design context, leading to highly accurate and functional results. In just 15 minutes, I transformed a simple design into a fully functional web app, completely bypassing traditional hand-coding.
Here’s how you can replicate this seamless integration yourself:
Step-by-Step Setup Guide
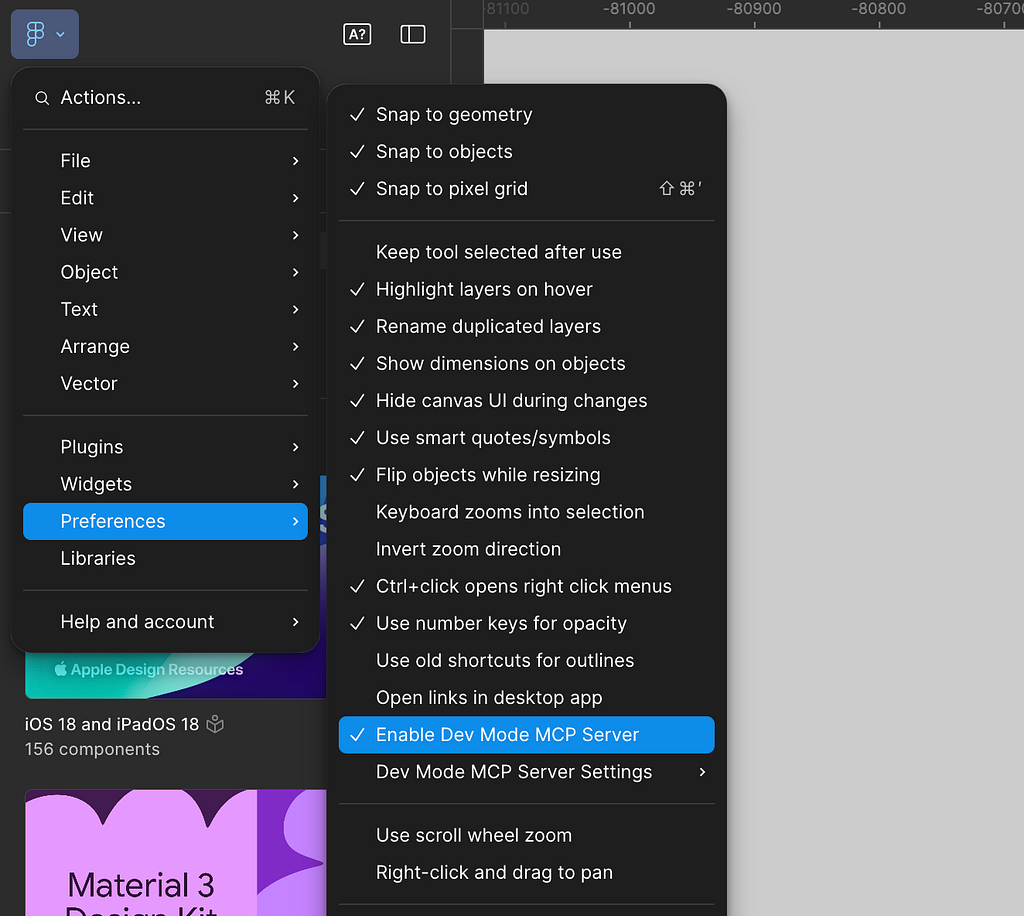
Step 1: Enable MCP Server in Figma
- Open your Figma desktop app.Click on the Figma icon in the top-left corner, go to Preferences, and select Enable Dev Mode MCP Server. (If this option isn’t visible, ensure your Figma app is updated.)
Note: MCP Server runs locally, requiring the desktop app, not available on the web version.
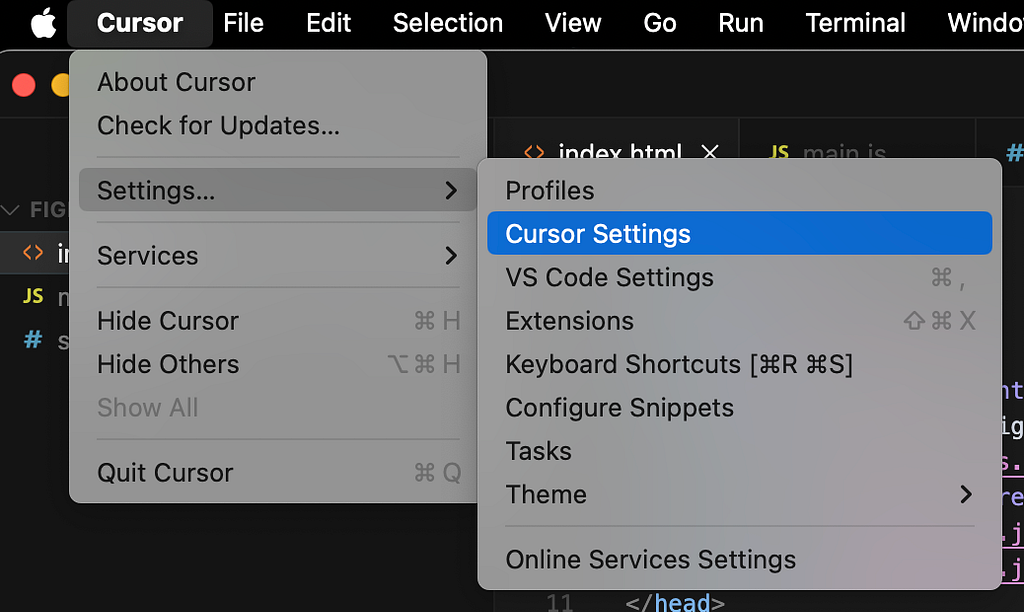
Step 2: Set Up MCP Client (AI Model)
After enabling the MCP server, you’ll need to connect it with an AI code editor like VS Code, Cursor, Windsurf, or Clude Code. I used Cursor for this demonstration:
- Launch the Cursor app and navigate to Settings → Cursor Settings → MCP Tools.
- Click on New MCP Server, opening a file named mcp.json.Paste the following JSON code into the file and save it: (you can also find this JSON here on Figma's official guide.)
{
  "mcpServers": {
    "Figma": {
      "url": "http://127.0.0.1:3845/sse"
    }
  }
}
After saving, verify the connection status. If it isn’t green, restart the connection by toggling it off and on.

Now, Cursor and Figma can seamlessly communicate, allowing Cursor to understand and incorporate your design context.
Step 3: Building Your Design with Prompts
To fully leverage MCP integration, keep these design tips in mind:
- Consistently use variable tokens, styles, and design system components.Employ Figma’s variables for spacing (margin, padding, gaps), colors, and effects.Utilize components from your design system, especially elements like input fields and buttons with multiple variants.
These practices ensure accurate context delivery to the AI client, enabling precise code generation.

As shown above, I’ve used variables for margins, padding, gaps, colors, and effects. Additionally, I’ve used input fields and buttons from the design system, which have variants. This helps the AI model automatically understand how your input fields and buttons behave on the functional website.
Prompting the AI
- After completing your Figma design, enable Dev Mode and copy the design frame link (shortcut: Cmd/Ctrl + L).

- In Cursor’s chat panel (Cmd/Ctrl + L), paste the copied link.

- Provide clear instructions. For example:
“@https://www.figma.com/design/janskdu3902n/File-Name?node-id=8192–3829&m=dev Create functional web page from this design using HTML,CSS, js and make sure to follow the exact same styling”
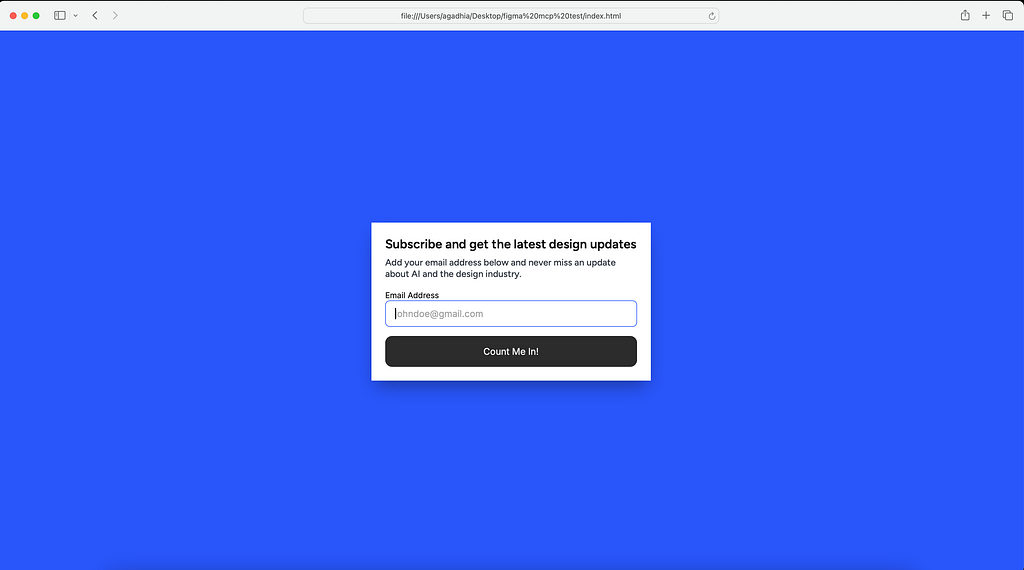
The Incredible Results
Cursor instantly generated highly accurate, functional code closely mirroring my design. Remarkably, it even understood interactive states like active input fields due to the design system context provided by Figma.
Thrilled by the initial success, I experimented further:
- Confetti Animation: Provided a JavaScript library URL, instructing when and where to trigger the animation.Email Integration: Asked Cursor for email functionality. It recommended EmailJS, guided me through setup, and seamlessly integrated email submission using my public key and service ID.
In just 20 minutes, my simple design was transformed into a fully interactive web page, complete with professional-grade functionality.
https://medium.com/media/283f21c3866d5511157027824fd31b4f/hrefAdvanced Prompting Tips:
- Clearly define interactive states (hover, active, disabled) in your design system to help AI accurately replicate these behaviors.Keep the reference of the variant, tokens, and style name the same as you defined in Figma.Provide external library URLs directly in your prompts whenever specific functionality or animations are required, ensuring precise integration.
Conclusion
The integration of Figma MCP and Cursor represents a groundbreaking shift for designers, empowering them to rapidly turn designs into functional, real-world products. This not only accelerates development but also bridges the gap between design and coding, opening new avenues of creativity and productivity. I can’t wait to see how this evolves and the endless possibilities it unlocks for designers everywhere!
New Figma MCP + Cursor Integration with Example was originally published in UX Planet on Medium, where people are continuing the conversation by highlighting and responding to this story.
